 Pin It
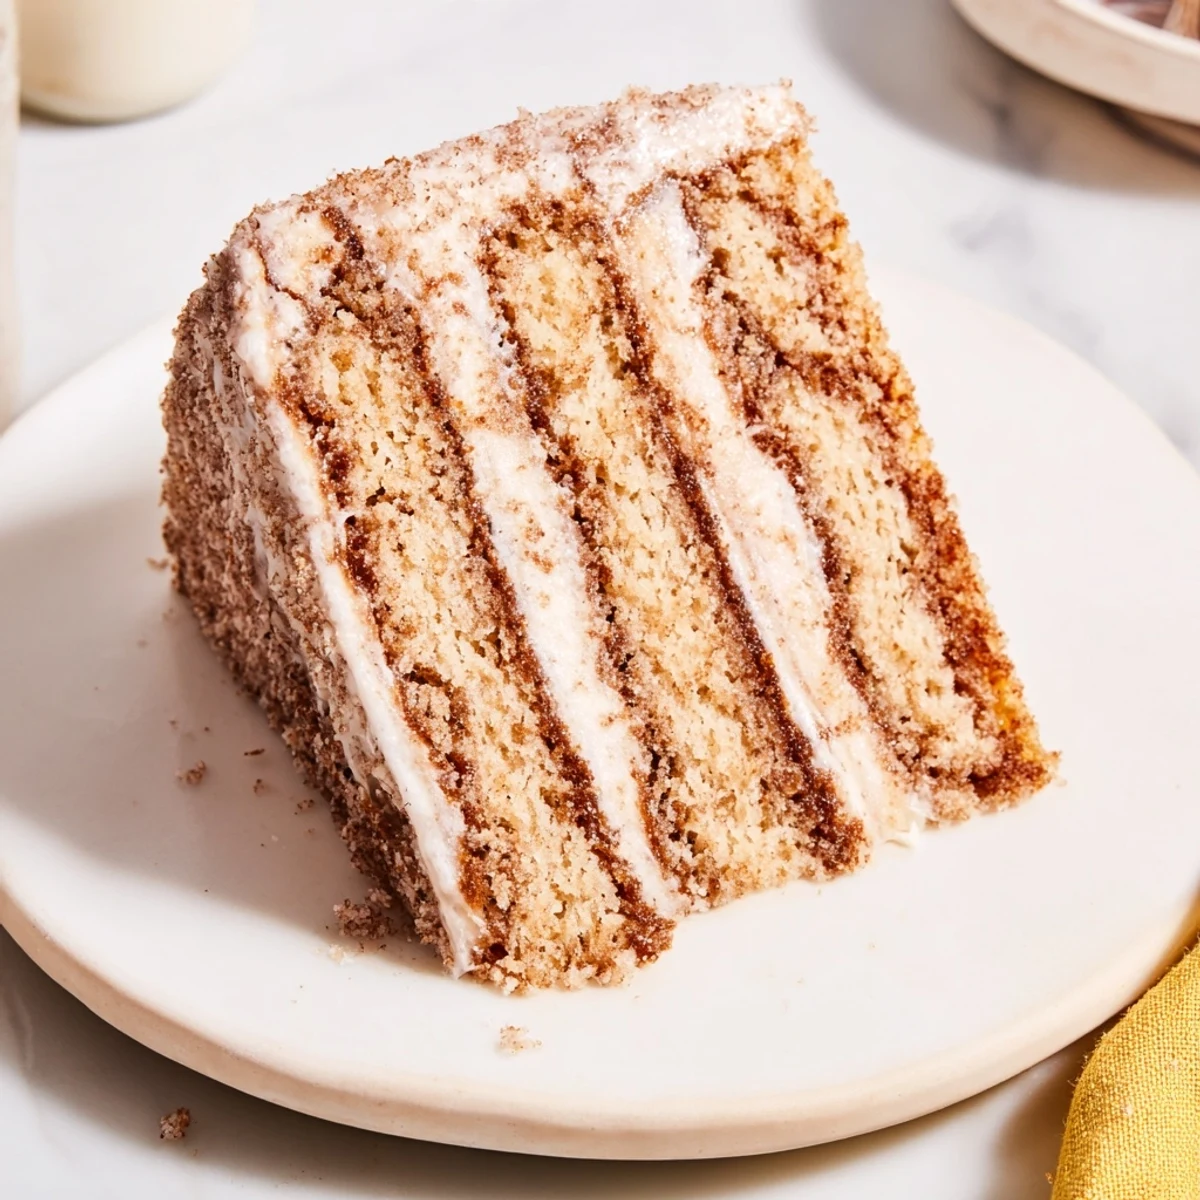
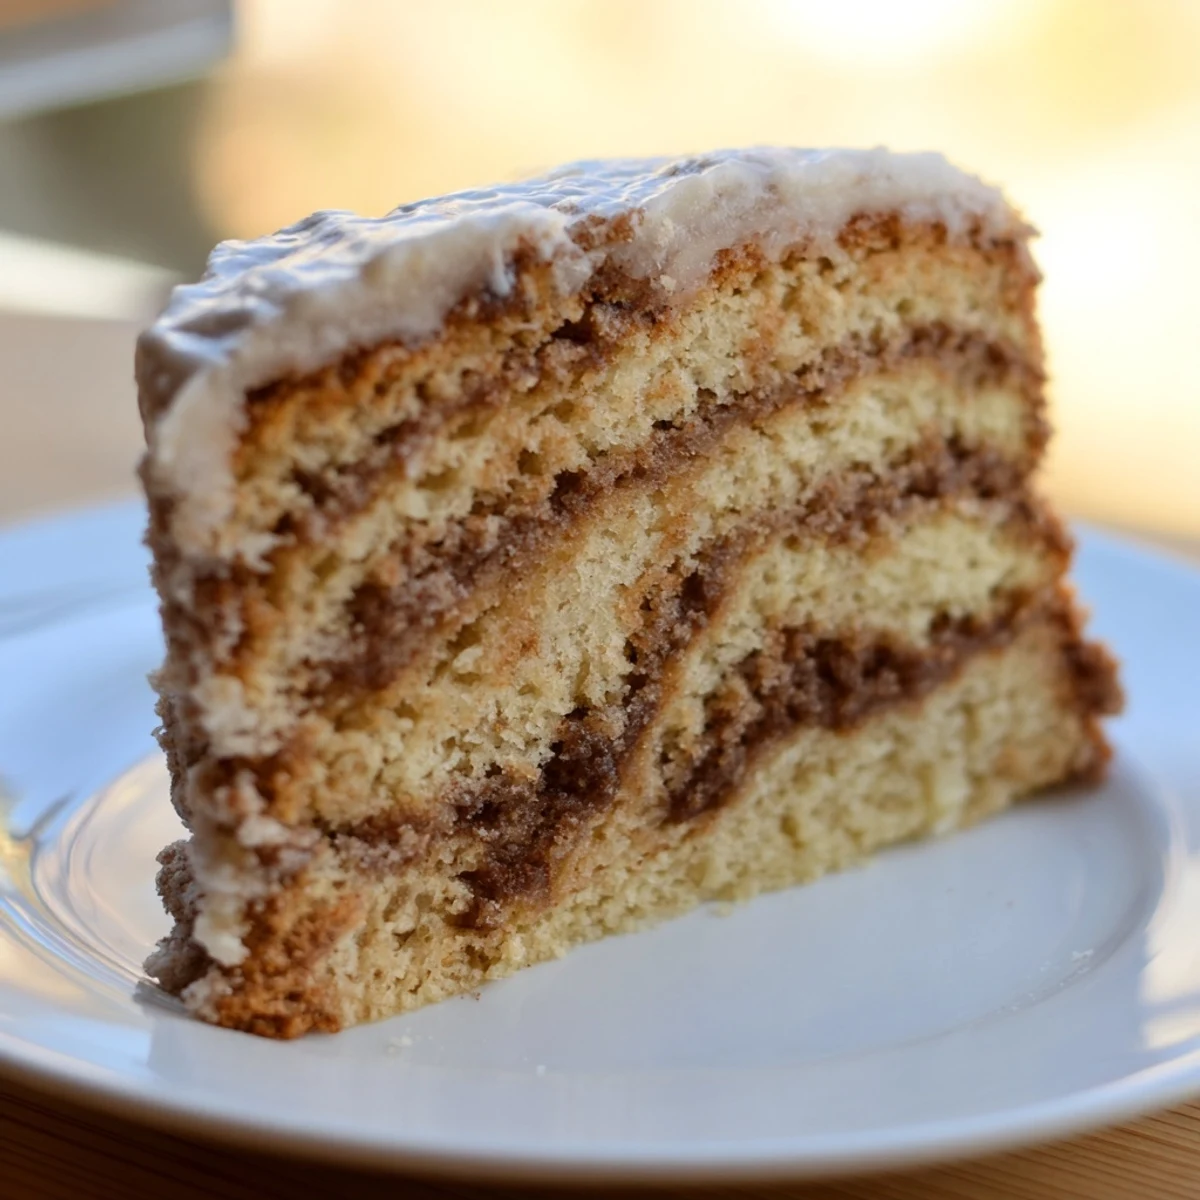
 This comforting winter dish combines the deep caramel notes of brown sugar with a naturally gluten-free base. Designed to bring warmth and sweetness during chilly months, it highlights simple, wholesome ingredients. Perfect for those seeking a naturally sweetened and allergy-conscious option, this treat ensures satisfying flavors without gluten. Its ease of preparation and robust taste make it an ideal choice for cold season enjoyment.
There's something magical about December mornings when snow starts to fall and the kitchen fills with the aroma of brown sugar and warmth. I remember my first attempt at this gluten-free treat on a particularly cold evening, standing at the window watching the flakes pile up while my oven worked its magic. The anticipation of that first bite, the way the sugar crystallized on top, made me feel like I'd discovered something precious. That moment taught me that the simplest recipes, made with care, become the memories we cherish most.
I made these for my neighbor's family during the first snowstorm of the season, and watching their faces light up as they bit into the warm, sugar-crusted exterior reminded me why baking matters. The way the brown sugar melted on their tongues, the simple pleasure of something homemade delivered in winter—it became our little neighborhood tradition.
Ingredients
- Brown sugar: The heart of this recipe, providing that deep molasses sweetness and creating a tender crumb. I've learned that packing it firmly into measuring cups makes all the difference in the final texture
- Butter: Use room temperature butter for the creamiest results, and don't skip this step—it creates the tender, melt-in-your-mouth quality that makes these special
- Eggs: These bind everything together while keeping the interior soft and cake-like despite being gluten-free
- Gluten-free all-purpose flour: Choose one with xanthan gum included, or add it separately—this prevents that gritty texture some gluten-free bakes can have
- Vanilla extract: A whisper of vanilla rounds out the brown sugar flavor beautifully
- Baking powder: The silent hero that gives these their tender rise without any gumminess
- Salt: Just a pinch to enhance the caramel notes of the brown sugar
- Cinnamon: A warming spice that whispers through each bite, evoking winter kitchens and cozy afternoons
Instructions
- Prepare your stage:
- Preheat your oven to 350°F and line a square baking pan with parchment paper. This ensures even baking and makes removal simple—you want to capture that perfect texture inside, tender and moist.
- Cream together the base:
- In a large bowl, beat softened butter with packed brown sugar until light and fluffy, about 2-3 minutes. This is where the magic begins—you're incorporating air that will make these tender and cloud-like.
- Incorporate eggs gently:
- Add eggs one at a time, beating well after each addition. Watch how the mixture transforms, becoming silkier with each egg. Add vanilla and mix until everything is well combined.
- Fold in the dry ingredients:
- Whisk together your gluten-free flour, baking powder, salt, and cinnamon in a separate bowl. Gently fold these into the wet mixture—don't overmix, as this keeps them tender. You want to see just a few streaks of flour remaining.
- Into the oven:
- Pour the batter into your prepared pan and smooth the top gently. Bake for 20-25 minutes, until a toothpick inserted in the center comes out with just a few moist crumbs. The edges will pull slightly from the pan when they're ready.
- Cool and savor:
- Let these rest in the pan for 5 minutes before turning out onto a cooling rack. This resting time is crucial—it allows the crumb structure to set, preventing crumbling.
 Pin It
 My greatest memory with this recipe came on a snowy afternoon when my daughter helped me bake for the first time. She carefully measured the brown sugar, pressing it into the cup just like I showed her, and when she tasted the warm result still dusted with sugar, her eyes closed in pure joy. That's when I realized this recipe is really about connection, about sharing something warm and comforting with the people who matter most.
The Science of Gluten-Free Baking
Gluten-free baking can feel mysterious, but understanding what gluten does helps everything click into place. Gluten creates structure and elasticity, so in its absence, we rely on other ingredients for structure. Eggs provide binding, xanthan gum provides elasticity, and careful mixing prevents the dense crumb that sometimes haunts gluten-free bakes. This recipe succeeds because brown sugar adds moisture and richness that naturally compensates for what gluten would have provided, creating something tender and true.
Serving and Storage Wisdom
These are best enjoyed warm, when the brown sugar flavor is most pronounced and the interior is still soft. Wrap any leftovers in an airtight container, where they'll keep for three days at room temperature or up to a week in the refrigerator. A quick warm-up in the oven at 300°F brings back that just-baked texture beautifully. I often freeze them wrapped individually, pulling them out on difficult mornings when we all need something comforting and real.
Winter Variations and Inspirations
Once you've mastered the base, this recipe becomes a canvas for your own kitchen creativity. I've added chopped pecans, a sprinkle of sea salt on top before baking, and even a drizzle of caramel after cooling. Think about what winters mean to you and what flavors belong in that story. The beauty of a simple recipe is that it welcomes personalization without losing its soul. Here are some ways to make it your own:
- Stir chopped toasted nuts into the batter for added texture and depth
- Sprinkle fleur de sel on top just before baking for a sophisticated sweet-salty contrast
- Add a touch of bourbon or rum to enhance the caramel notes if you're serving adults
 Pin It
 This recipe has become my meditation, my way of slowing down when the world outside is cold and hurried. Whether you're baking for yourself or for someone you love, I hope it brings the same warmth and peace to your winter.
Recipe Questions & Answers
- → What makes this winter treat naturally sweet?
-
The rich caramel flavor comes from the careful use of brown sugar, adding depth and warmth without overpowering.
- → How is gluten-free achieved here?
-
Gluten-free flours or alternative ingredients are used to maintain texture while excluding gluten sources.
- → Can this dish be served warm or cold?
-
It's traditionally enjoyed warm to enhance the comforting flavors, but can also be served at room temperature.
- → Are there any suggestions to enhance the flavor?
-
Adding spices like cinnamon or nutmeg can boost the winter warmth characteristic of the dish.
- → Is this suitable for a holiday gathering?
-
Absolutely, its rich sweetness and warming qualities make it perfect for festive occasions.
