 Pin It
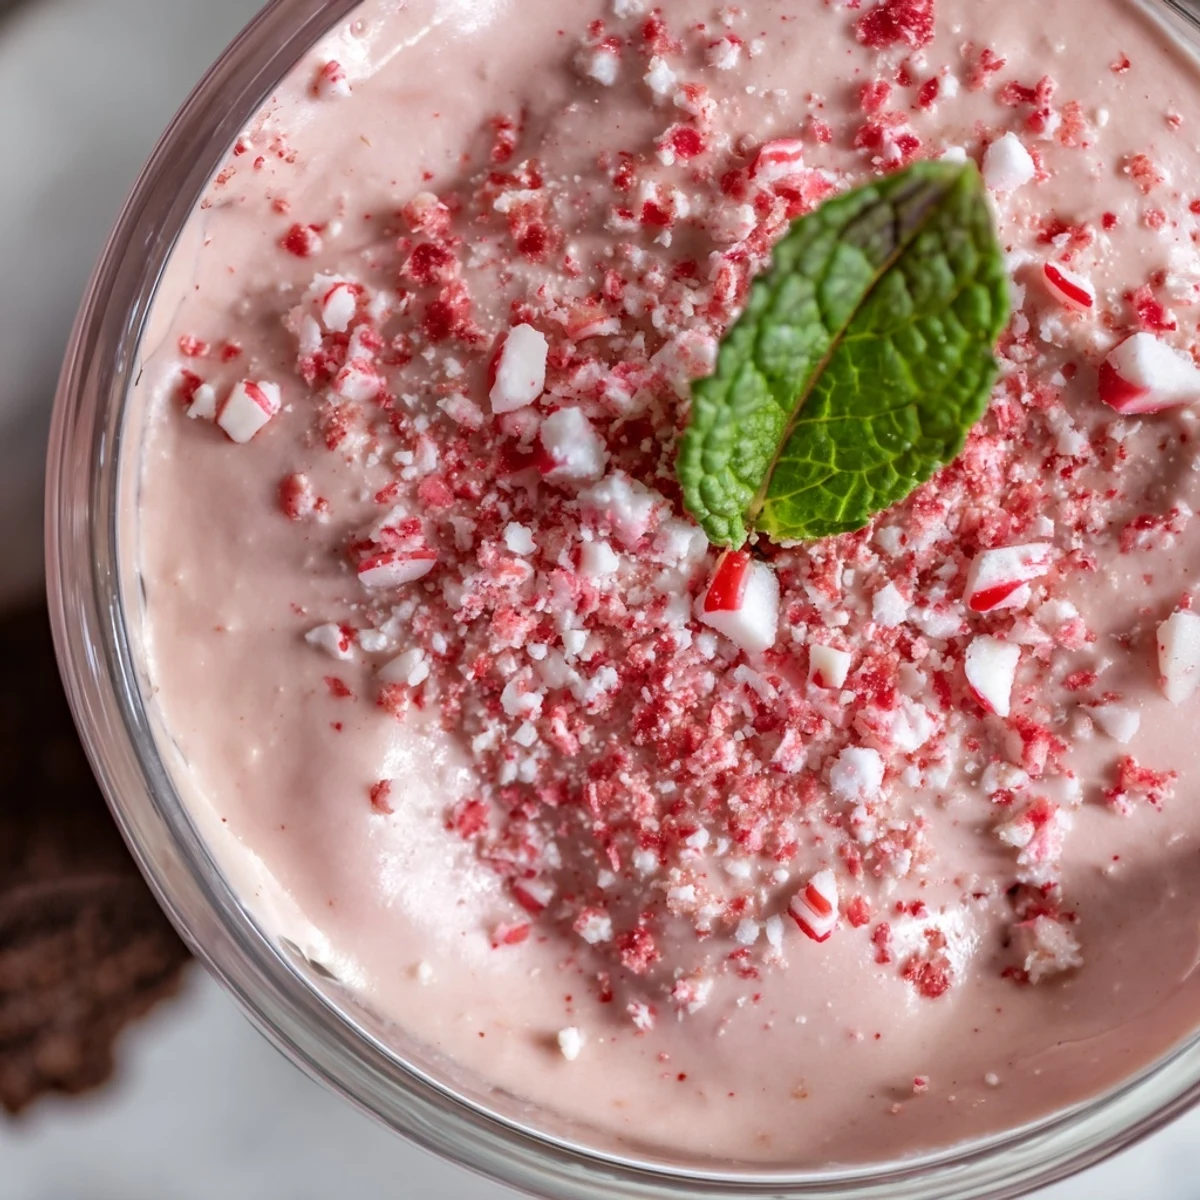
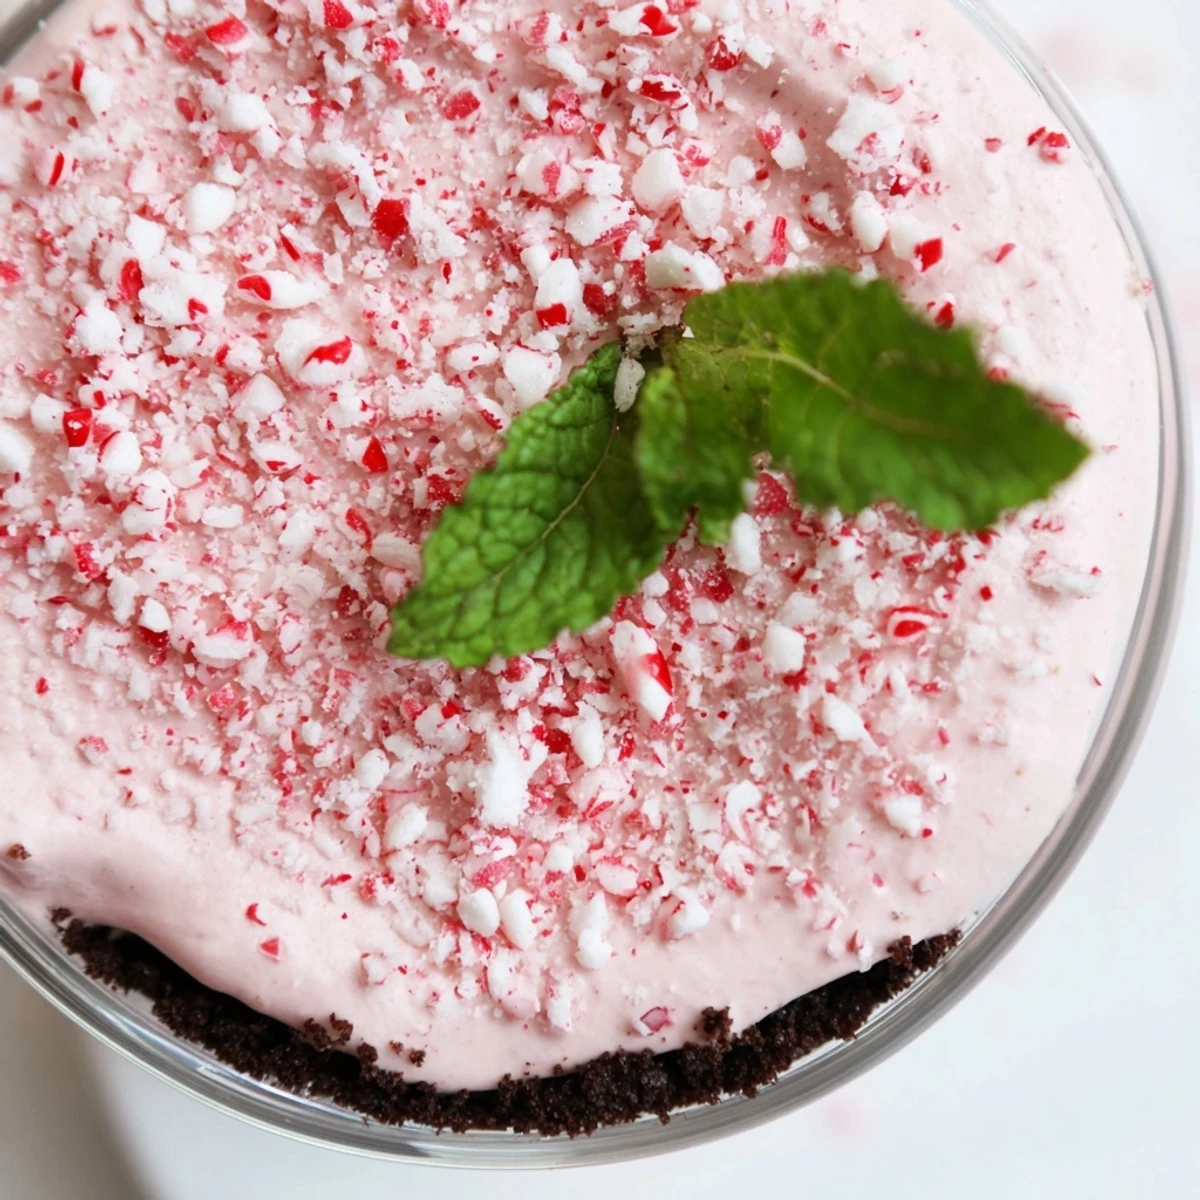
 This festive gluten-free dessert layers a smooth peppermint mousse over a crunchy chocolate base for a delightful winter treat. The mousse blends cold heavy cream, cream cheese, powdered sugar, and peppermint extract, lightly tinted with red food coloring for a soft pink hue. After pressing a gluten-free cookie crumb crust with melted butter, the mousse is chilled to set. Finished with crushed peppermint candies and fresh mint leaves, it’s a refreshing and creamy indulgence perfect for holiday gatherings or simple celebrations.
There's something about January that makes me crave anything peppermint, even though the holidays officially ended weeks ago. I discovered this dessert while standing in my kitchen on a gray afternoon, holding a box of gluten-free cookies and thinking about how nice it would be to have something creamy and minty without the guilt. This layered mousse came together so naturally that I couldn't believe I'd never made it before, and now it's become my secret weapon when I need something impressive but effortless.
I first made this for a dinner party on one of those evenings when I'd procrastinated on dessert until the last possible moment. My friend Sarah arrived early to help, and while we were laughing about my usual last-minute panic, we assembled these in her gorgeous wine glasses, and they looked so polished that everyone assumed I'd spent hours in the kitchen. That's when I realized this dessert has a kind of magic—it feels fancier than it actually is, which makes it perfect for those nights when you want to impress without stress.
Ingredients
- Gluten-free chocolate cookie crumbs (1 cup): The foundation of everything, and honestly the quality of your cookies matters here—I've learned that nicer cookies give you a more sophisticated base that doesn't taste purely sweet.
- Unsalted butter, melted (3 tbsp): This binds the crumbs into a crumbly-but-holds texture that's so satisfying when you bite through it.
- Heavy cream, cold (1 1/4 cups): Keep this genuinely cold—it whips better and creates that cloud-like texture that makes mousse feel special.
- Powdered sugar (1/2 cup): It dissolves seamlessly into the mousse, giving you that silky sweetness without grittiness.
- Pure peppermint extract (1/2 tsp): This is not the imitation stuff—pure extract tastes crisp and bright, like actual peppermint leaves rather than artificial candy flavor.
- Cream cheese, softened (4 oz): This gives the mousse its structure and a subtle tang that keeps it from feeling one-note sweet.
- Vanilla extract (1/2 tsp): A quiet flavor that lets the peppermint shine without disappearing into the background.
- Natural red food coloring, 2 drops (optional): It creates that gentle pink blush that makes the dessert feel festive without screaming 'holiday'.
- Crushed gluten-free peppermint candies (1/4 cup): The finishing touch that gives you crunch and reminds people this is a peppermint dessert.
- Fresh mint leaves (optional): A small green garnish that makes everything look intentional.
Instructions
- Make the chocolate foundation:
- Toss your chocolate cookie crumbs with melted butter until they feel like damp sand, then press them firmly into the bottom of your serving glasses. You want it compact enough to hold together but still have some texture—don't pulverize it into powder.
- Prepare the creamy base:
- Beat your softened cream cheese until it's completely smooth with no lumps, then mix in the powdered sugar, peppermint extract, and vanilla until everything is well combined. This step takes about a minute and makes a huge difference in the final texture.
- Create the airy magic:
- In a separate bowl (a cold one if you have it), whip the heavy cream to stiff peaks—you'll know it's ready when the peaks stand straight up and don't flop over. Gently fold this into the cream cheese mixture using a spatula, taking care not to deflate all those air bubbles you just created.
- Add color if desired:
- Stir in the red food coloring if you're using it, just a couple drops to achieve that pale pink color that feels wintery and elegant.
- Layer and set:
- Spoon the mousse over the chocolate base in each glass, smoothing the tops to look polished, then cover and refrigerate for at least 2 hours until everything is completely set and chilled.
- Finish with flair:
- Just before serving, sprinkle the crushed peppermint candies over the top and add a mint leaf if you want that restaurant-quality garnish.
 Pin It
 What I love most about this dessert is watching people's faces when they taste it—that moment when they realize the bottom is crunchy and the top is mousse-light and everything tastes like a fancier version of peppermint bark. It transformed from being just a recipe I made because I had ingredients on hand into something I now make whenever I want to feel like I've got my life together, even on my most chaotic weeks.
Making It Your Own
Once you understand how this layered mousse works, you can play with it endlessly. I've made chocolate versions with hot fudge stirred into the mousse, and versions with crushed candy canes instead of peppermint extract when I wanted a brighter flavor. The structure stays the same—a crunchy base, an airy middle, and a sweet finish—but the flavors can shift with whatever you're craving or whatever you have in your pantry.
Timing and Make-Ahead Magic
The beauty of this dessert is that you can build everything early in the day and forget about it until dinner time, which makes it perfect for entertaining. I usually assemble mine in the morning, throw them in the fridge, and by evening they're perfectly set. You could even make them a day ahead if you cover them well—this is not a dessert that gets soggy or sad sitting in the refrigerator.
Variations and Swaps
If dairy isn't in your world, substitute plant-based cream cheese and coconut cream and you'll get something just as luxurious. For extra chocolate flavor, layer some chocolate shavings or crumbled gluten-free brownies into the mousse before chilling, or add a thin drizzle of melted chocolate between the base and the mousse. If you're serving this to someone who loves drama, dust the top with cocoa powder mixed with powdered sugar for a sophisticated look that takes thirty seconds.
- A cup of hot chocolate or peppermint tea alongside these feels like the natural pairing, completing the wintery vibe.
- Make sure you're using certified gluten-free cookies and candies if this matters for your guests, and always check labels for cross-contamination warnings.
- You can prep the chocolate bases and mousse separately up to a few hours ahead, then assemble them whenever you're ready to serve.
 Pin It
 This dessert has quietly become my favorite thing to make when I want something that feels both celebratory and effortless. There's something deeply satisfying about layering something so simple and watching it transform into something that tastes like someone spent all day on it.
Recipe Questions & Answers
- → What makes this dessert gluten-free?
-
All ingredients including the chocolate cookie crumbs and peppermint candies are certified gluten-free to ensure safety for gluten-sensitive individuals.
- → Can I substitute the cream cheese for a dairy-free option?
-
Yes, replacing cream cheese with plant-based cream cheese and using coconut cream instead of heavy cream creates a dairy-free variation.
- → How long should I chill the dessert before serving?
-
Refrigerate the dessert for at least 2 hours to allow the mousse to set firmly over the chocolate base.
- → What tools are recommended for preparation?
-
Mixing bowls, electric mixer or whisk, small serving glasses or ramekins, and a spatula are ideal for assembling this dessert.
- → Can I customize the dessert for extra richness?
-
Consider adding chocolate shavings or layering with gluten-free brownie crumbs to enhance texture and richness.
