 Pin It
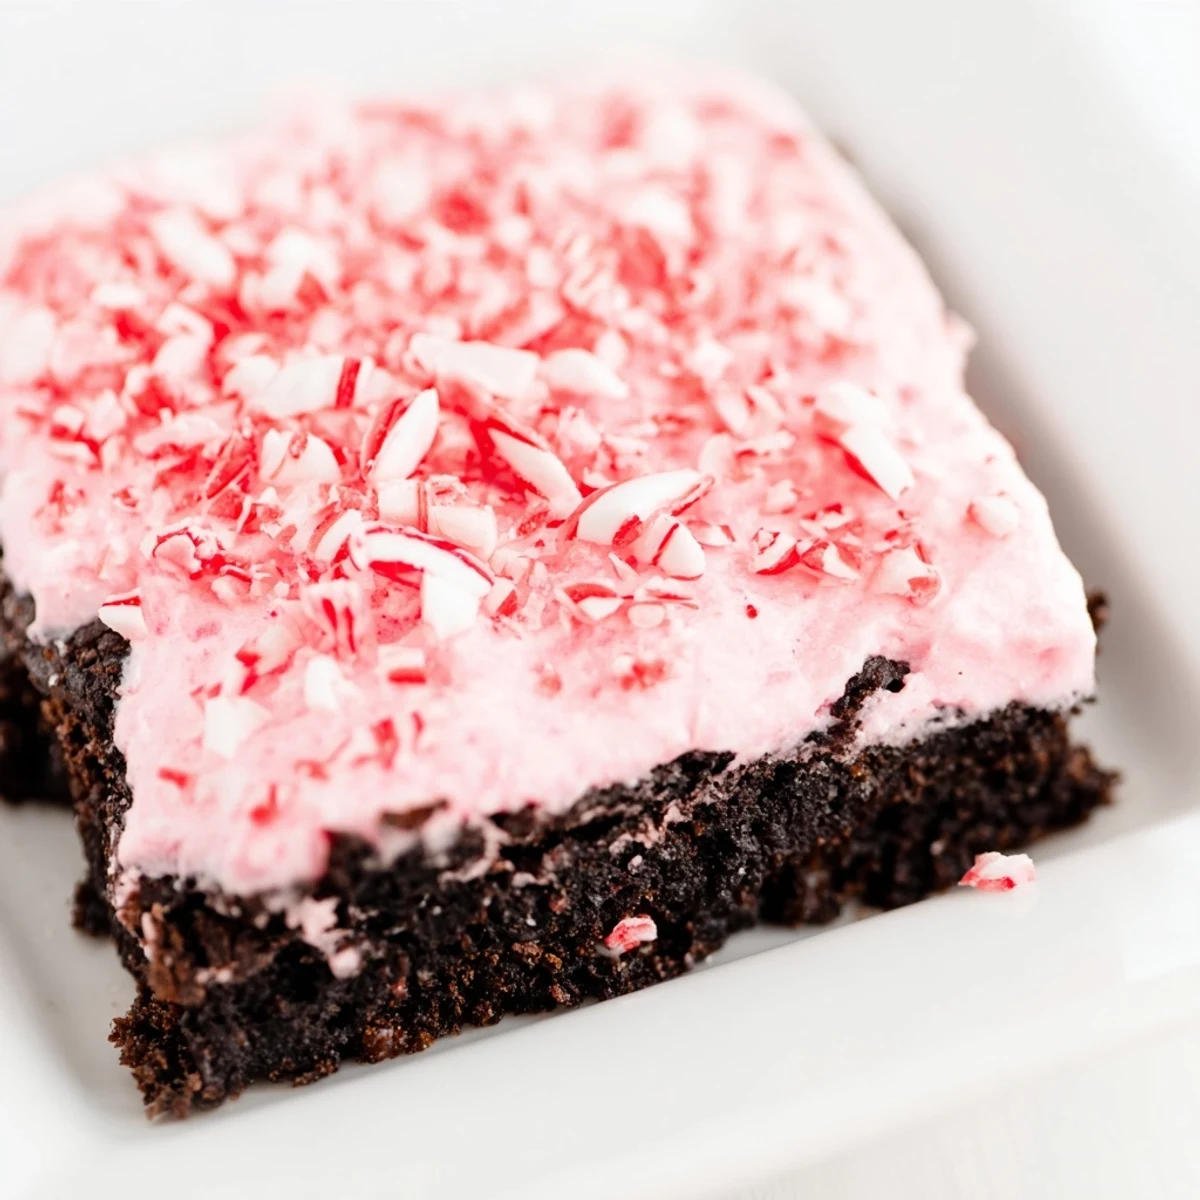
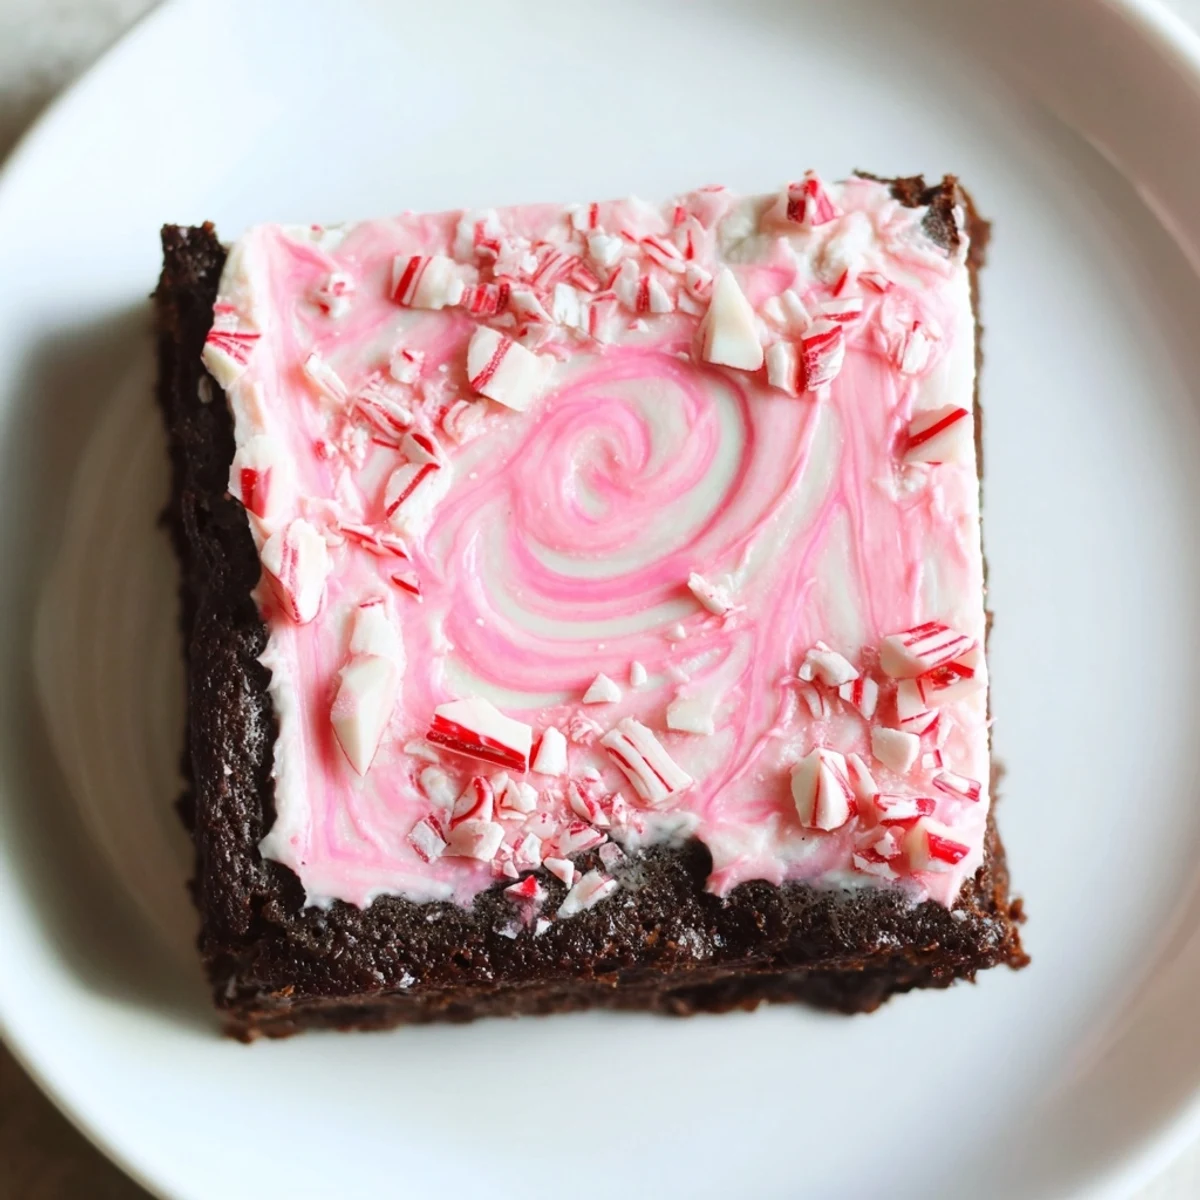
 This festive treat features a rich, gluten-free peppermint brownie base with a creamy, cool peppermint frosting swirled with hints of red for a celebratory look. The topping of crushed peppermint candy canes adds a perfect crunch and refreshing flavor contrast. Easy to prepare and perfect for holiday gatherings, these brownies offer a balanced sweetness with chocolate and peppermint notes, ideal for sharing in the New Year.
Every December, my kitchen fills with the smell of melting chocolate just as the year starts to wind down, and I find myself making these peppermint brownies without fail. There's something about the combination of rich, fudgy chocolate and cool mint that feels like the perfect way to celebrate—it's indulgent without being heavy, festive without trying too hard. My friends have stopped asking what I'm bringing to New Year's parties; they just show up expecting a tin of these. This year, I finally perfected the gluten-free version, and honestly, nobody can tell the difference.
I remember making a batch at 11 p.m. on New Year's Eve when someone texted asking if I could bring dessert to an impromptu gathering, and even rushed, they turned out incredible. That's when I knew this recipe was genuinely forgiving—no fancy decorating required, just good chocolate, the right amount of peppermint, and a handful of crushed candy canes on top. The whole thing came together in under an hour, and I actually enjoyed the process instead of stressing.
Ingredients
- Unsalted butter: Use real butter here—it makes the chocolate melt smoother and the frosting taste silky instead of greasy.
- Semi-sweet chocolate chips (gluten-free): Check the label; many brands are naturally gluten-free, but some have hidden cross-contamination risks if you're sensitive.
- Granulated sugar: This sweetens the base while keeping the brownie structure tight.
- Eggs: Room temperature eggs mix in more smoothly and create a glossier batter.
- Pure vanilla and peppermint extract: Don't skimp on quality here—the peppermint extract is what makes these taste like the holiday.
- Gluten-free all-purpose flour blend: I use a blend with xanthan gum included to avoid dense brownies.
- Powdered sugar: For the frosting—sifted if you have time, lumpy if you don't, it all smooths out.
- Crushed candy canes: Save the prettiest pieces for topping; the smaller shards mix into frosting if you're not careful.
Instructions
- Melt chocolate and butter together:
- Use 30-second bursts in the microwave, stirring between each one—this prevents the chocolate from seizing and keeps everything glossy. The bowl stays warm and the mixture comes together silky.
- Whisk in sweetness and flavor:
- Once the chocolate cools slightly, add sugar and eggs, then vanilla and peppermint extract. Whisk until you see a light, glossy sheen—that's when you know air's in the batter and the brownies will be properly fudgy.
- Fold in flour gently:
- Folding instead of stirring keeps the air you just whipped in. Stop as soon as you don't see dry flour streaks; overmixing makes the brownies tough.
- Bake with attention:
- At 22 minutes, stick a toothpick in the center—if it comes out clean, you've gone too far. Moist crumbs mean it'll be perfect once it cools and the carryover heat finishes the job.
- Make frosting that spreads smoothly:
- Softened butter is key; cold butter won't incorporate the sugar evenly. Add milk a tablespoon at a time until it reaches spreading consistency, not too thick or it'll tear the delicate brownie surface.
- Finish with color and crunch:
- Red food coloring swirled into white frosting looks elegant without extra effort. Sprinkle candy cane pieces right before serving so they stay crisp instead of melting into the frosting.
 Pin It
 There was one year I brought these to a dinner party and a friend asked if they were actually gluten-free, then looked genuinely shocked when I said yes. That moment of watching someone taste something they thought they couldn't have anymore was worth more than any compliment. It reminded me that good food does more than fill a stomach—it makes people feel seen and included.
Dairy-Free Swaps That Actually Work
If you need dairy-free, vegan butter and non-dairy milk work perfectly fine—I've tested both and they don't change the texture or taste noticeably. Some non-dairy milks are thinner than cow's milk, so start with a tablespoon instead of two and add more as you beat the frosting. The chocolate is the star anyway; the frosting is just there to balance the intensity and add that peppermint finish.
Why Peppermint Extract Makes All the Difference
The first time I made these with dried peppermint leaves crushed into the batter, they tasted dusty and weak. Switching to peppermint extract changed everything—it's bright, clean, and distributes evenly through the chocolate. A little goes a long way; half a teaspoon in the brownie and another half in the frosting creates that signature holiday flavor without tasting like toothpaste.
Serving and Storage Secrets
These brownies actually improve after a day as the peppermint flavor deepens and mellows slightly. Keep them in an airtight container at room temperature and they'll stay perfect for three days, though they rarely last that long in my house. They pair beautifully with hot chocolate, sparkling wine, or even strong black coffee if you want something unexpected.
- Cut with a warm, wet knife for clean edges and less crumbling.
- Stack them between parchment paper so the frosting doesn't stick to the container.
- These freeze well for up to two weeks if you want to make them ahead of the holidays.
 Pin It
 There's something special about ending a year with something homemade, something that took care and a little bit of thought. These brownies have become my tradition, and maybe they'll become yours too.
Recipe Questions & Answers
- → How do I make the brownies gluten-free?
-
Use a gluten-free all-purpose flour blend and ensure all ingredients, including chocolate chips and candy canes, are certified gluten-free.
- → Can I make these dairy-free?
-
Substitute vegan butter and dairy-free chocolate chips to keep the dessert dairy-free without compromising flavor or texture.
- → What is the best way to achieve a creamy peppermint frosting?
-
Beat softened butter until smooth, gradually add powdered sugar, then peppermint extract and milk to reach a fluffy and creamy consistency.
- → How should I store the peppermint squares?
-
Store in an airtight container at room temperature for up to three days to maintain freshness and texture.
- → Can I add color to the frosting?
-
Yes, adding a few drops of red food coloring creates a festive pink swirl that complements the peppermint flavor.
