 Pin It
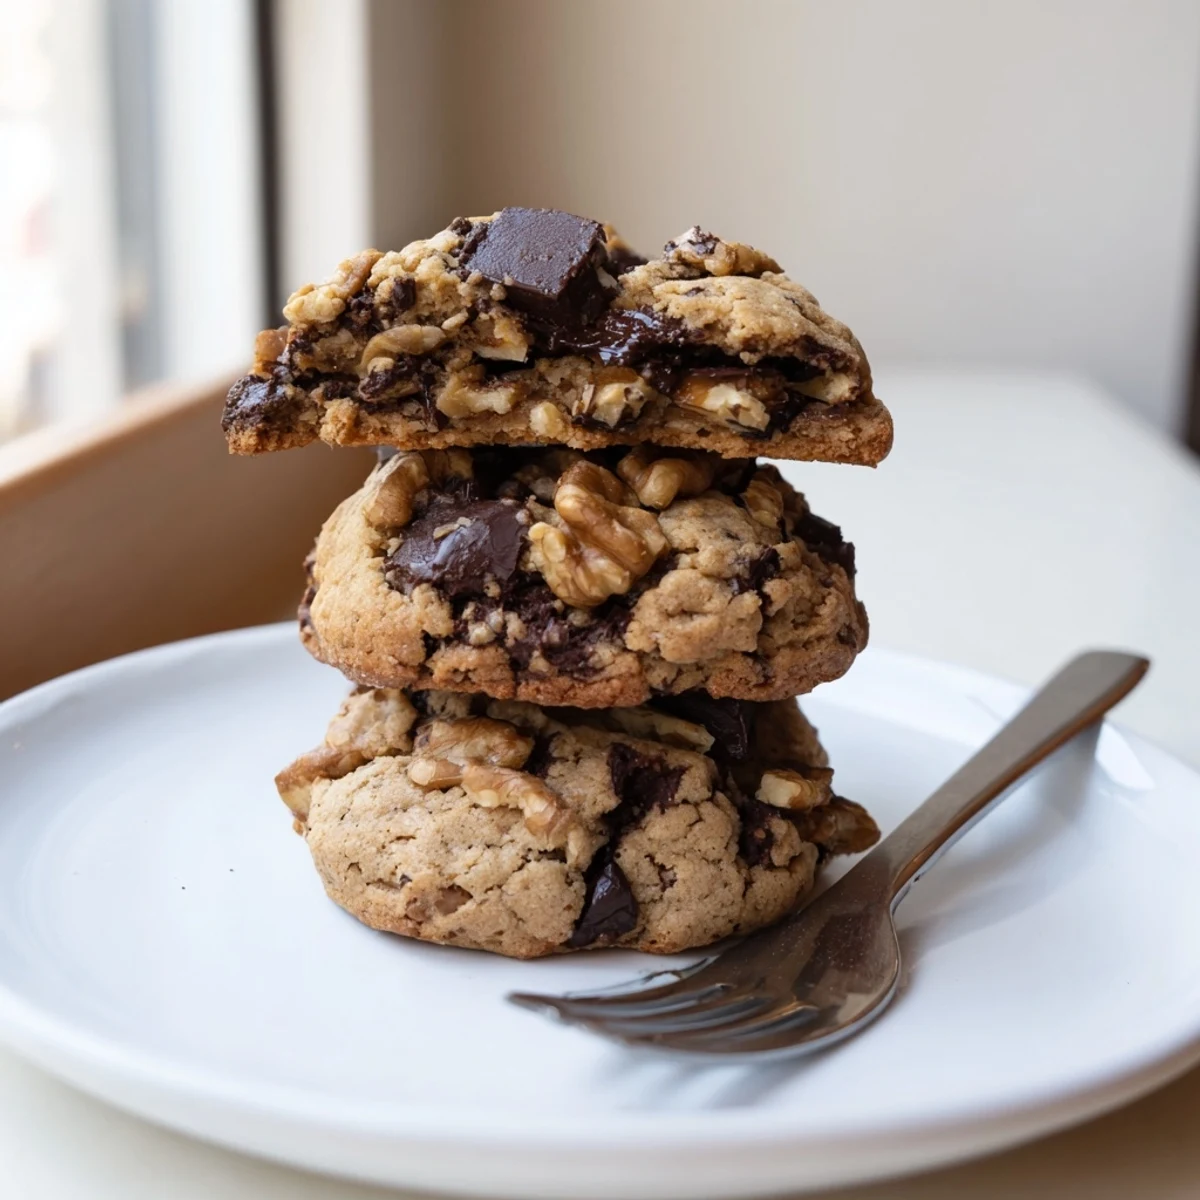
 These crisp-edged, chewy-centered cookies bring together deeply rich dark chocolate chunks and warmly toasted walnuts, all wrapped in a buttery gluten-free walnut butter dough.
Ready in just 32 minutes with 20 minutes of prep and 12 minutes in the oven, they yield 24 generously studded cookies perfect for any dessert spread.
The walnut butter adds a nutty depth that pairs beautifully with the bittersweet chocolate, while the gluten-free flour blend keeps them accessible for everyone at the table.
The rain was hammering against the kitchen window the afternoon I stumbled into these cookies, half frustrated by a grocery delivery that substituted walnut butter for the almond butter I actually ordered. I stood there staring at the jar, already committed to making cookies, and decided stubbornness would have to pass for resourcefulness. That jar of walnut butter turned out to be one of the best mistakes my kitchen has ever produced. The dough smelled like toasted forests and warm brown sugar before it even hit the oven.
I brought a tin of these to my neighbor Daves house for a movie night, not telling him they were gluten free, and he ate four before the opening credits finished. He still asks about them every time I see him in the hallway. There is something about the combination of dark chocolate and toasted walnuts that makes people forget to be polite about portion sizes.
Ingredients
- Gluten free all purpose flour blend (1½ cups): Use a blend that already contains xanthan gum if possible, it saves you an extra ingredient and gives the cookies a better structure.
- Baking soda (½ teaspoon): Just enough lift to keep these from spreading into flat puddles on the sheet.
- Fine sea salt (½ teaspoon): Do not skip this, salt is the quiet hero that makes dark chocolate sing.
- Unsalted butter, room temperature (½ cup): Leave it on the counter for about an hour, cold butter will not cream properly and you will end up with greasy pockets.
- Walnut butter, creamy and unsweetened (½ cup): Stir it well before measuring because the oil separates and settles on top, and you want that fat distributed evenly.
- Light brown sugar, packed (¾ cup): Packing it into the cup matters here, loose brown sugar means less moisture and drier cookies.
- Granulated sugar (¼ cup): A small amount helps the edges crisp up while the brown sugar keeps the centers chewy.
- Large egg (1): It binds everything together and adds richness, bring it to room temperature so it blends smoothly.
- Pure vanilla extract (1 teaspoon): Use the real stuff, imitation vanilla leaves a flat chemical aftertaste that no amount of chocolate can hide.
- Dark chocolate chunks or chips, 60 to 70% cacao (1 cup): Chunks melt into gorgeous uneven puddles, while chips hold their shape, choose based on the texture you prefer.
- Toasted walnuts, roughly chopped (1 cup): Toasting them in a dry pan for a few minutes wakes up oils you never knew were there, it takes thirty seconds and changes everything.
Instructions
- Preheat and prepare:
- Set your oven to 350°F and line two baking sheets with parchment paper, pressing the sheets flat so the dough does not slide around later.
- Whisk the dry ingredients:
- In a medium bowl, whisk together the gluten free flour, baking soda, and salt until evenly combined and free of any small lumps.
- Cream the butters and sugars:
- Using an electric mixer on medium speed, beat the room temperature butter, walnut butter, brown sugar, and granulated sugar in a large bowl for about two minutes until the mixture looks pale, fluffy, and irresistible.
- Add the egg and vanilla:
- Beat in the egg and vanilla extract until the batter is smooth and glossy, scraping down the sides of the bowl with a spatula to catch anything hiding near the bottom.
- Combine wet and dry:
- With the mixer on low speed, gradually add the dry ingredients to the wet mixture, stopping as soon as the last streak of flour disappears into the dough.
- Fold in the good stuff:
- Use a spatula to gently fold in the dark chocolate chunks and toasted walnuts, distributing them evenly without overworking the dough.
- Scoop and shape:
- Scoop tablespoon sized portions of dough onto the prepared baking sheets, leaving about two inches of space between each mound so they have room to spread.
- Bake until golden:
- Bake for 11 to 13 minutes until the edges are golden and the centers look just barely set, pulling them out a touch early is always better than leaving them too long.
- Cool properly:
- Let the cookies rest on the baking sheet for five minutes, then transfer them gently to a wire rack to cool completely and firm up their texture.
 Pin It
 These cookies became my go to gift during the holidays, wrapped in brown paper and tied with kitchen twine, and every single person who received them assumed I had bought them from a bakery. That tiny deception made me grin every time.
Storing and Freezing
Keep these cookies in an airtight container at room temperature and they stay beautifully chewy for up to five days, though in my household they rarely survive past day two. You can also freeze the baked cookies for up to three months, layering parchment between them so they do not stick together. The raw dough freezes beautifully too, scooped into balls and stored in a freezer bag, ready to bake straight from frozen with just an extra minute or two added to the timer.
Ingredient Swaps That Actually Work
Almond butter slides right in for the walnut butter if that is what you have on hand, though the flavor shifts a little sweeter and more delicate. If nuts are a concern entirely, sunflower seed butter works but can turn the dough slightly green from a chemical reaction with the baking soda, which tastes fine but looks startling. Regular all purpose flour works perfectly if gluten is not a concern for you, just swap it measure for measure and proceed exactly as written.
A Few Final Thoughts
These cookies are forgiving in all the ways that matter, they do not demand precision or perfection, just a willingness to mix good things together and wait twelve minutes. Let your oven do the work while you lick the spatula clean.
- Always check your chocolate chips or chunks for gluten free certification if that matters to you, some brands process on shared equipment.
- A cookie scoop makes portioning faster and more uniform than using spoons, and it is worth the few dollars.
- Trust your eyes over the timer, ovens vary wildly and the difference between perfect and overdone can be sixty seconds.
 Pin It
 Make a batch, share them freely, and watch how a simple cookie can turn an ordinary afternoon into something worth remembering. That is the real recipe right there.
Recipe Questions & Answers
- → Can I substitute almond butter for the walnut butter?
-
Yes, almond butter works well as a direct substitute for walnut butter in this dough. Use the same quantity of creamy, unsweetened almond butter for equally delicious results with a slightly different nutty flavor profile.
- → How do I get those beautiful crinkled tops on the cookies?
-
As soon as you pull the baking sheet from the oven, gently lift it and tap it firmly on the counter once or twice. This sudden impact causes the cookies to settle and creates those coveted crinkled edges and tops.
- → What percentage of cacao should the dark chocolate have?
-
Aim for dark chocolate between 60% and 70% cacao. This range provides a rich, bittersweet contrast to the sweet cookie dough without being overly intense. Chunks or chips both work beautifully.
- → How should I store these cookies to keep them fresh?
-
Store completely cooled cookies in an airtight container at room temperature for up to 5 days. Layering them between sheets of parchment paper prevents sticking and helps maintain their crisp edges.
- → Can I freeze the cookie dough for later baking?
-
Absolutely. Scoop the dough into tablespoon-sized portions and freeze them on a baking sheet until solid. Transfer the frozen dough balls to a freezer bag and bake directly from frozen, adding 2 to 3 extra minutes to the baking time.
- → Why did my cookies spread too much during baking?
-
Over-spreading usually means the dough was too warm when it went into the oven. Try chilling the scooped dough for 30 minutes before baking. Also ensure your walnut butter isn't overly runny, as thinner nut butters can cause excess spreading.
