 Pin It
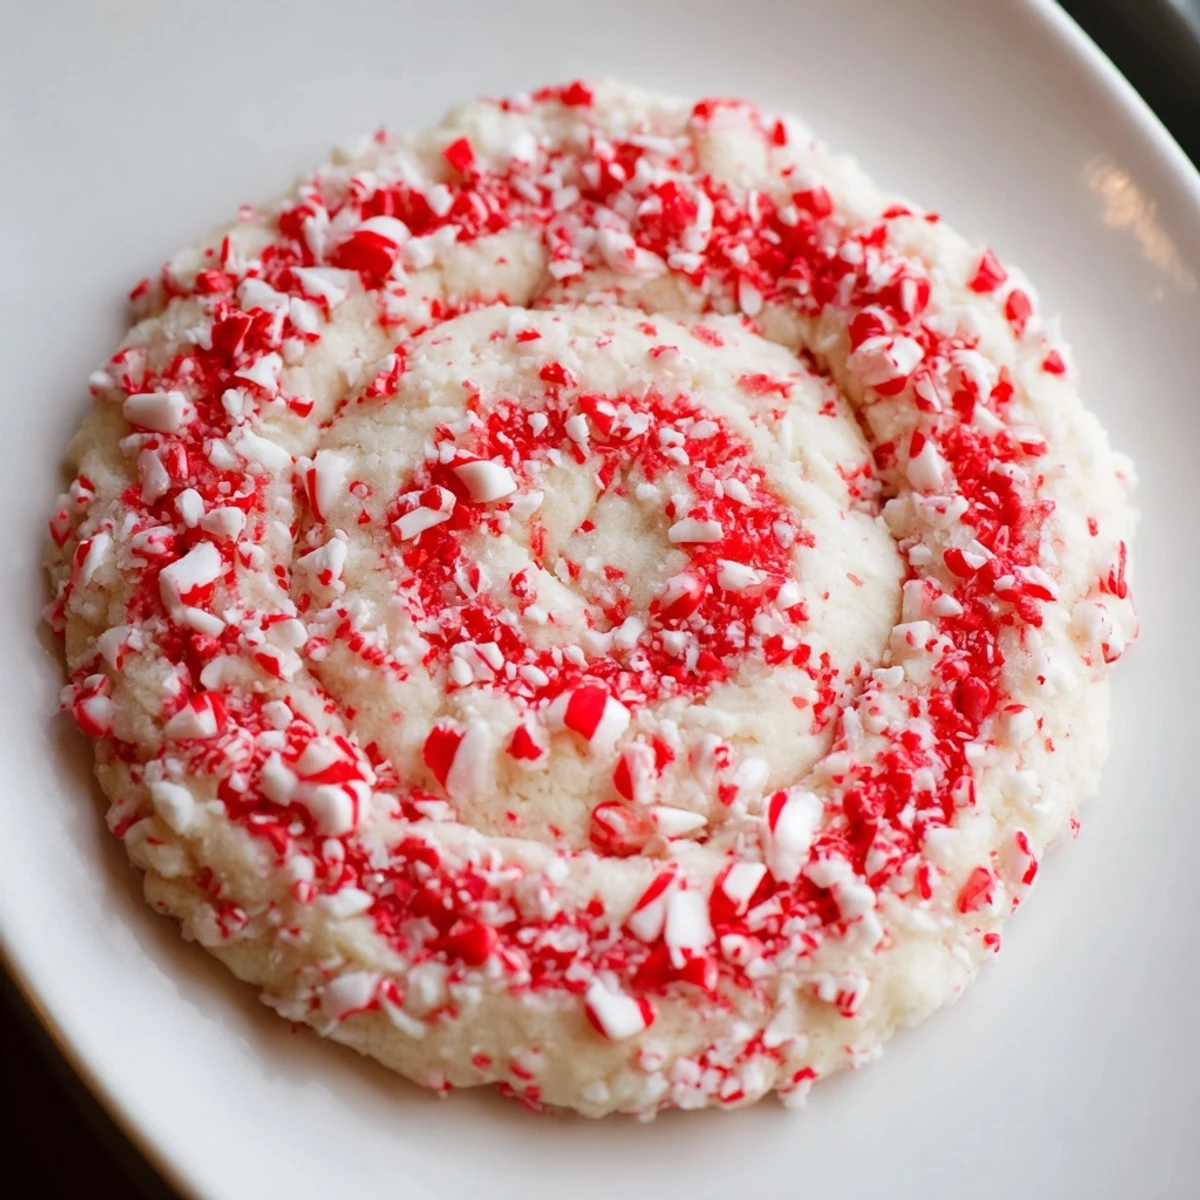
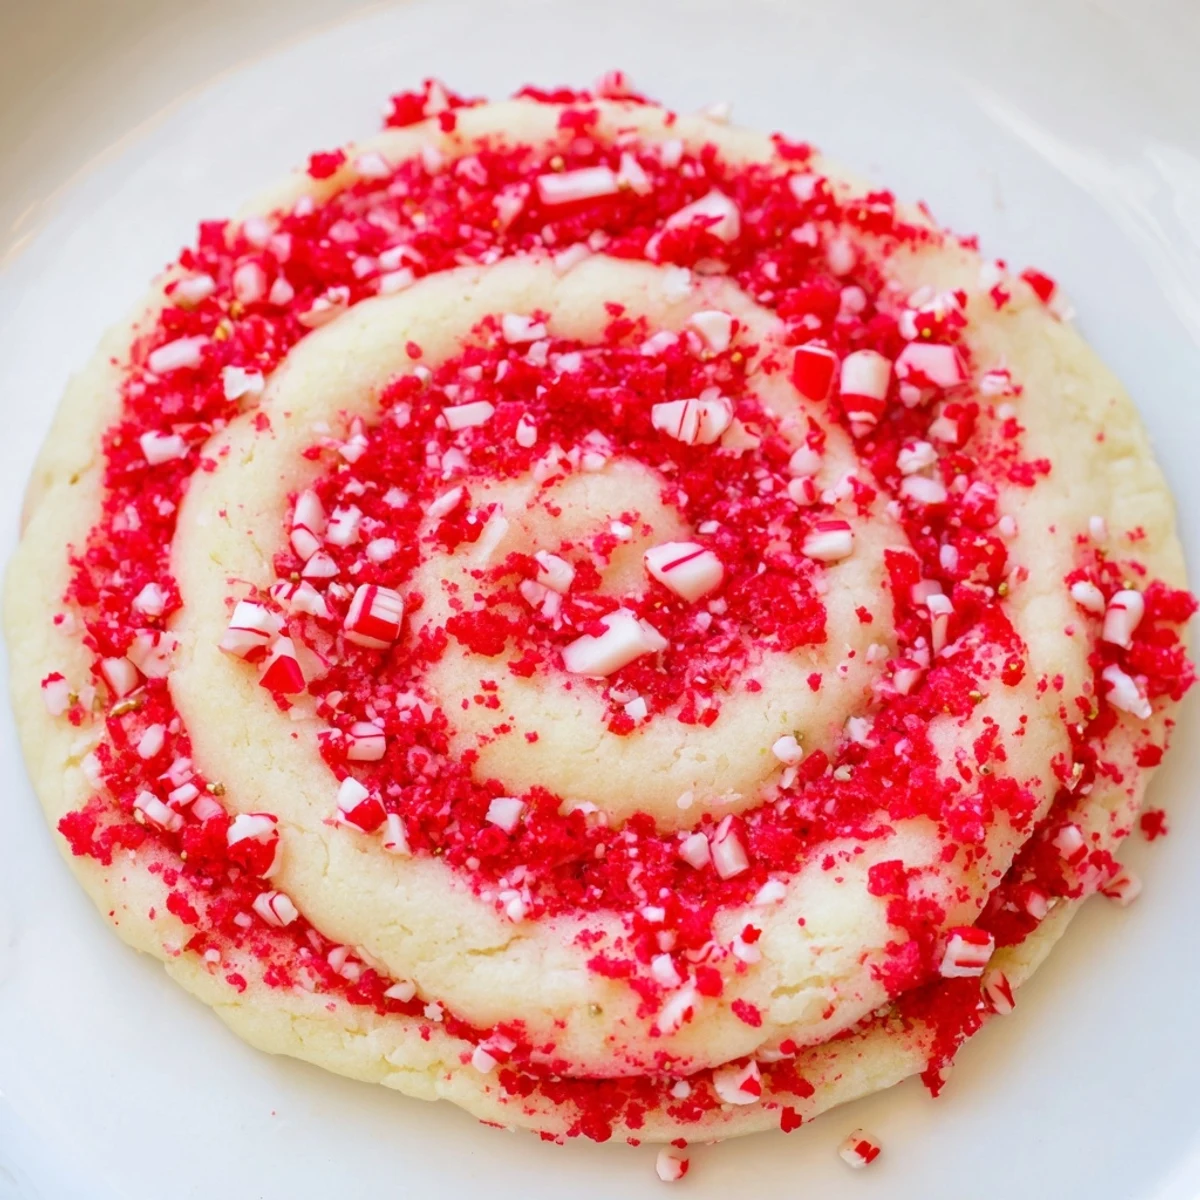
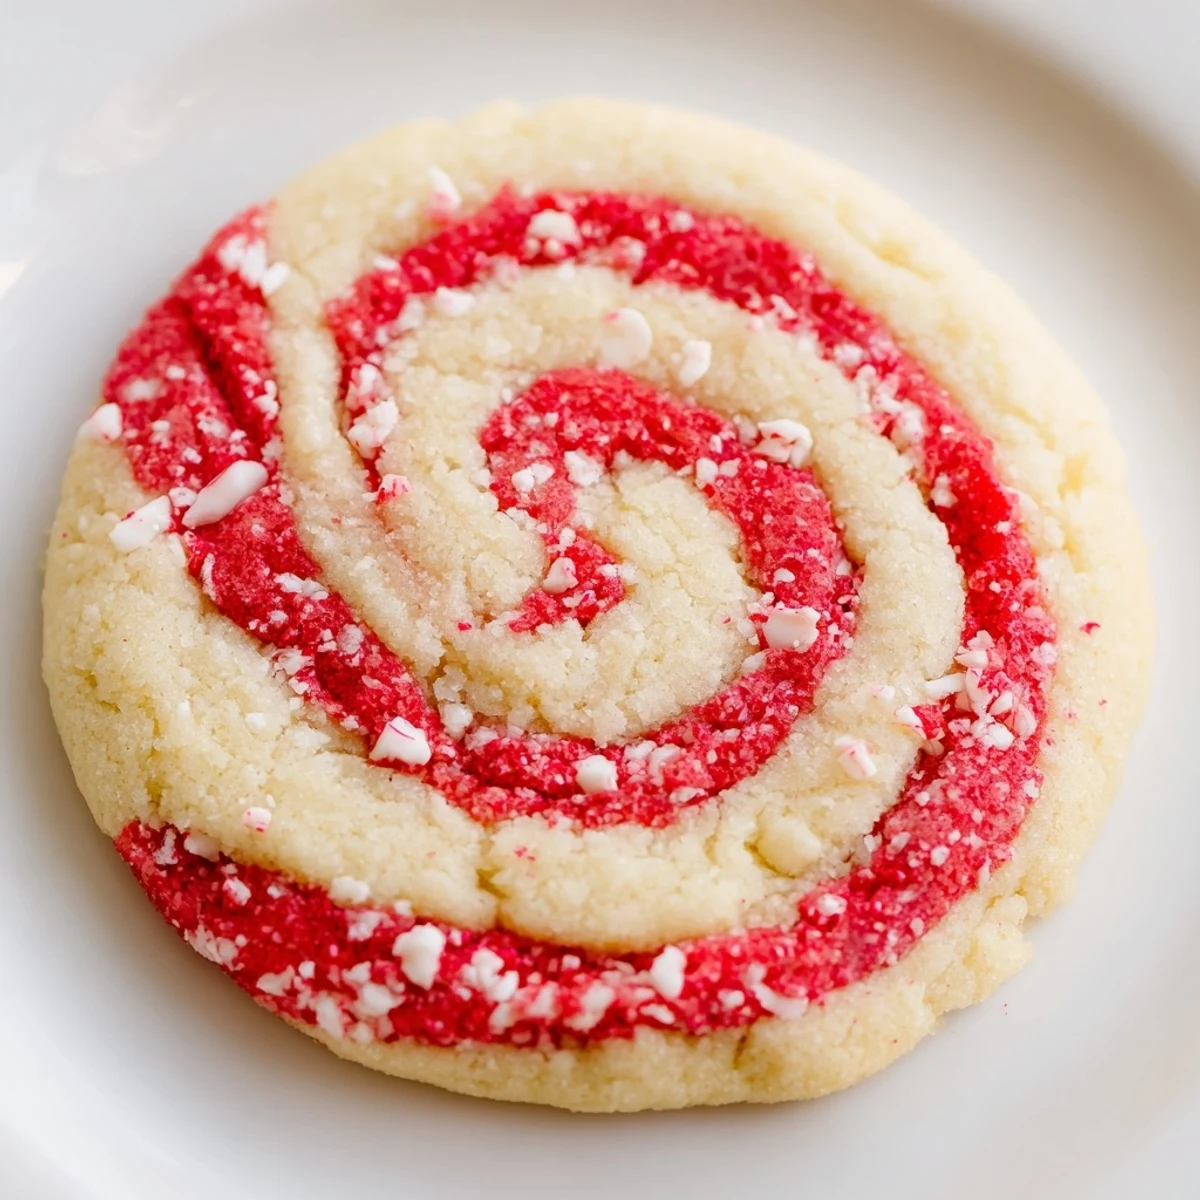
 These soft, buttery sugar cookies combine classic sweetness with a refreshing peppermint twist, perfect for warming up cozy evenings. The dough is divided and colored, then twisted into spirals for a festive look. Crushed peppermint candies add a delightful crunch on top. Chilling the dough before baking ensures tender texture. Ideal for holiday gatherings or enjoying with hot chocolate or tea.
I stumbled upon the idea for these peppermint twist cookies one December afternoon when a friend was wrapping presents in my kitchen and kept snacking on candy canes from the tree. She mentioned how nice it would be to taste that peppermint flavor in something soft and buttery instead of just hard candy, and suddenly I was mixing dough. The first batch came out beautifully striped, and by evening, they were gone—everyone wanted seconds.
Last year, I brought these to a neighborhood cookie swap, and I watched someone take a bite and just close their eyes for a moment like they'd been transported somewhere warm and safe. That's when I realized these weren't just cookies—they were the edible version of a cozy night in. Now I make them whenever someone needs a little comfort in cookie form.
Ingredients
- All-purpose flour (2 1/2 cups): This is your foundation—it needs to be fresh and measured correctly, so spoon and level rather than scooping straight from the bag.
- Baking powder (1/2 teaspoon): Just enough to give the cookies a gentle lift so they're tender instead of dense and heavy.
- Salt (1/4 teaspoon): It won't make them taste salty; it actually makes the peppermint flavor pop.
- Unsalted butter (1 cup, softened): Softened means it should yield slightly to pressure but still hold its shape—room temperature is your friend here.
- Granulated sugar (1 cup): This creams with the butter to create that signature tender crumb.
- Large egg (1): Make sure it's at room temperature so it blends smoothly into the dough without streaking.
- Vanilla extract (1 teaspoon): Pure vanilla, not imitation, because you can taste the difference in every bite.
- Peppermint extract (1 teaspoon): This is what makes the magic happen—but taste the dough and adjust if you want it stronger or milder.
- Red gel food coloring: Gel holds its color better than liquid, and you'll need less to get a rich, vibrant red.
- Crushed peppermint candies (1/3 cup): Crush them just before using so they stay sharp and sparkly on top of the warm cookies.
Instructions
- Dry ingredients meeting:
- Whisk together the flour, baking powder, and salt in a medium bowl until everything is evenly distributed. This prevents little pockets of baking powder from creating bitter spots.
- Butter and sugar dance:
- Beat the softened butter and sugar together for 2 to 3 minutes until it looks pale and fluffy—like clouds. This is where air gets incorporated, which makes the cookies tender.
- Bringing it together:
- Add the egg, vanilla, and peppermint extract to the creamed butter and sugar, mixing until you can't see any streaks. Don't overmix here; just combine.
- Marrying wet and dry:
- Gradually add the dry mixture to the wet ingredients, stirring just until the dough comes together. A few flour streaks are fine—overmixing develops gluten and makes cookies tough.
- The color split:
- Divide the dough in half and knead red gel coloring into one portion until the color is even and rich. The white dough stays as is.
- The patience pause:
- Wrap both doughs tightly in plastic wrap and chill for 30 minutes. Cold dough is easier to shape and bakes more evenly.
- Setting the stage:
- Preheat your oven to 350°F and line two baking sheets with parchment paper. This keeps the bottoms from browning too quickly.
- Twisting the magic:
- Take a tablespoon of white dough and a tablespoon of red dough, roll each into a rope about 6 inches long, then twist them together gently. Coil or shape as you like—candy cane shape looks festive, but spirals are just as charming.
- The final setup:
- Space the twisted cookies 2 inches apart on the prepared sheets, then sprinkle each one with crushed peppermint candies while the dough is still soft enough for them to stick.
- The golden moment:
- Bake for 9 to 11 minutes, watching for the edges to set and turn just barely golden. The centers should still feel soft to the touch.
- Cooling wisdom:
- Let the cookies sit on the baking sheet for 5 minutes to firm up slightly, then transfer to a wire rack to cool completely. Cooling on the sheet makes them chewy; cooling on a rack makes them crisp at the edges.
 Pin It
 There's something almost meditative about twisting those ropes of dough together, watching the red and white blend and spiral. One evening, my daughter helped me make these, and she was so focused on getting each twist perfect that she forgot to ask how much longer until bedtime. The cookies became less about the destination and more about those quiet minutes side by side in the kitchen.
Why the Twist Matters
The twisted shape isn't just pretty—it actually serves a purpose. The two colors of dough bake together at slightly different rates because of the food coloring, which creates those gorgeous marbled edges. Plus, the visual drama of a striped cookie makes people feel like they're eating something fancy, even though the actual technique is simple enough for a kid to master in minutes.
Flavor Balance and Customization
The beauty of this recipe is that the vanilla and peppermint extracts play well together—neither one drowns out the other. If you're serving these to someone who loves bold peppermint, bump the extract up slightly and add an extra tablespoon of crushed candies on top. If you're cooking for someone who's peppermint-shy, dial it back and let the buttery sweetness shine instead.
Storage and Serving Secrets
These cookies stay fresh in an airtight container for up to a week, though honestly they rarely last that long. I've learned to bake them the day before serving because the flavors deepen overnight and the texture becomes perfectly balanced between tender and structured. They're at their absolute best alongside hot chocolate or tea, when you're wrapped in something warm and the world feels a little quieter.
- Layer them in a container with parchment between the layers to prevent them from sticking together.
- If they soften over time, pop them in a 300°F oven for 2 minutes to re-crisp the edges.
- These are wonderful gifts too—stack them in a festive box with a handwritten note about how to enjoy them.
 Pin It
 These cookies remind me that the best recipes are the ones that bring people together and make a moment feel special. Every time I bake them, I'm doing more than following instructions—I'm creating something that tastes like comfort and care.
Recipe Questions & Answers
- → What gives the cookies their peppermint flavor?
-
Pure peppermint extract and crushed peppermint candies provide the refreshing peppermint taste throughout the twist and as a topping.
- → How long should the dough be chilled?
-
Chill both portions of dough for 30 minutes to firm up, making them easier to shape and ensuring a tender texture after baking.
- → Can I shape the cookies differently?
-
Yes, the twisted dough ropes can be coiled into spirals or shaped like candy canes for a festive appearance.
- → What type of flour is used?
-
All-purpose flour is used, combined with baking powder and salt for proper texture and rise.
- → Are these cookies suitable for vegetarians?
-
Yes, the ingredients contain no meat products and are suitable for a vegetarian diet.
- → How should the cookies be stored?
-
Store the cooled cookies in an airtight container for up to one week to maintain freshness.
