 Pin It
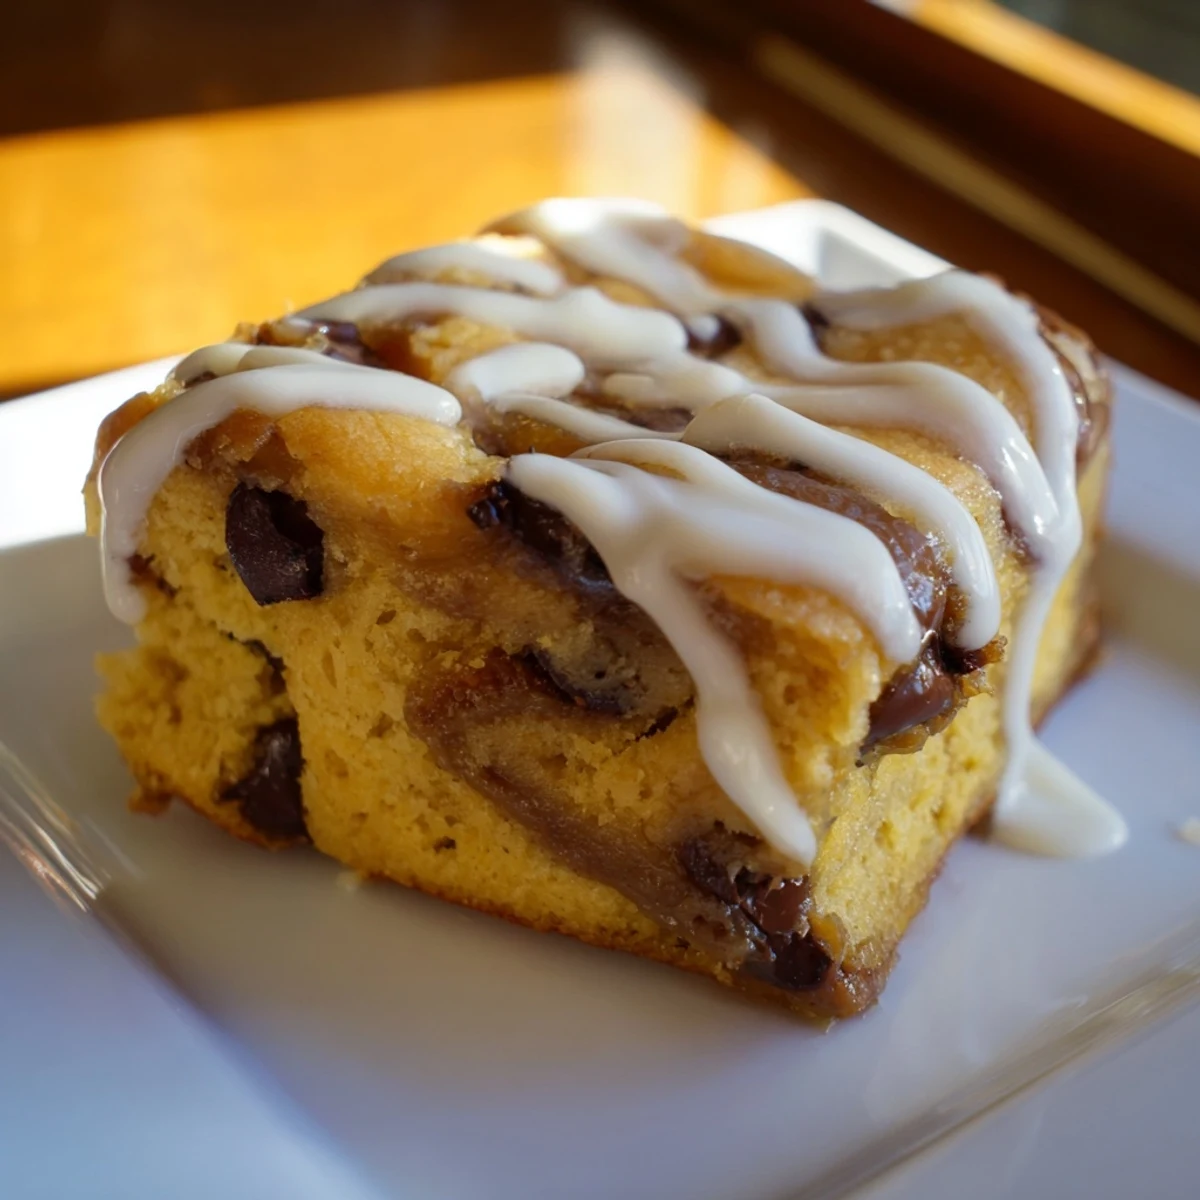
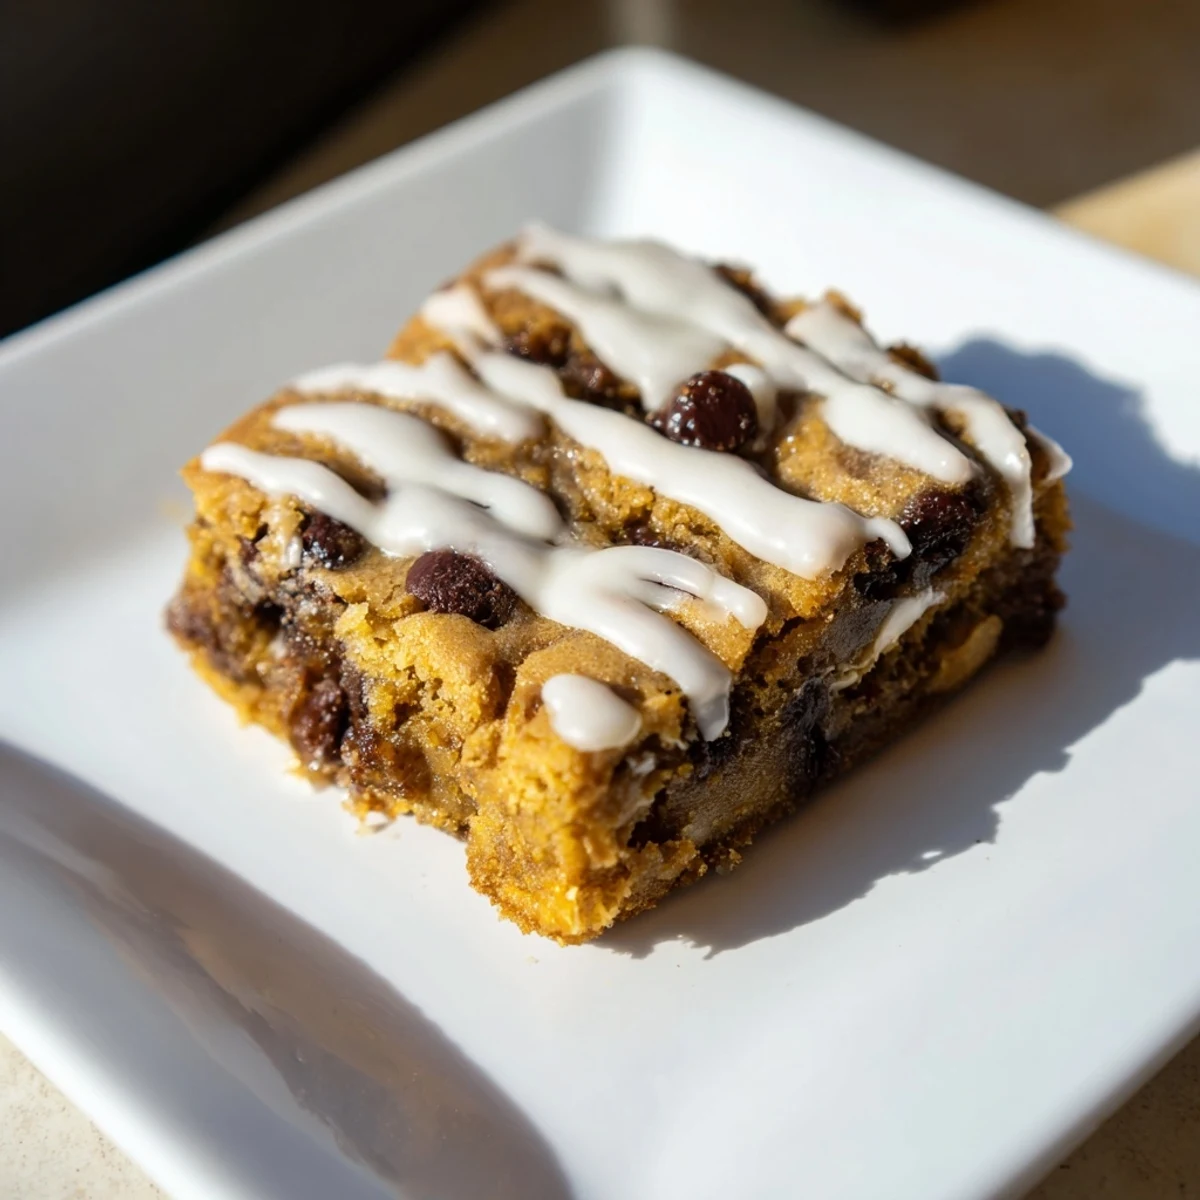
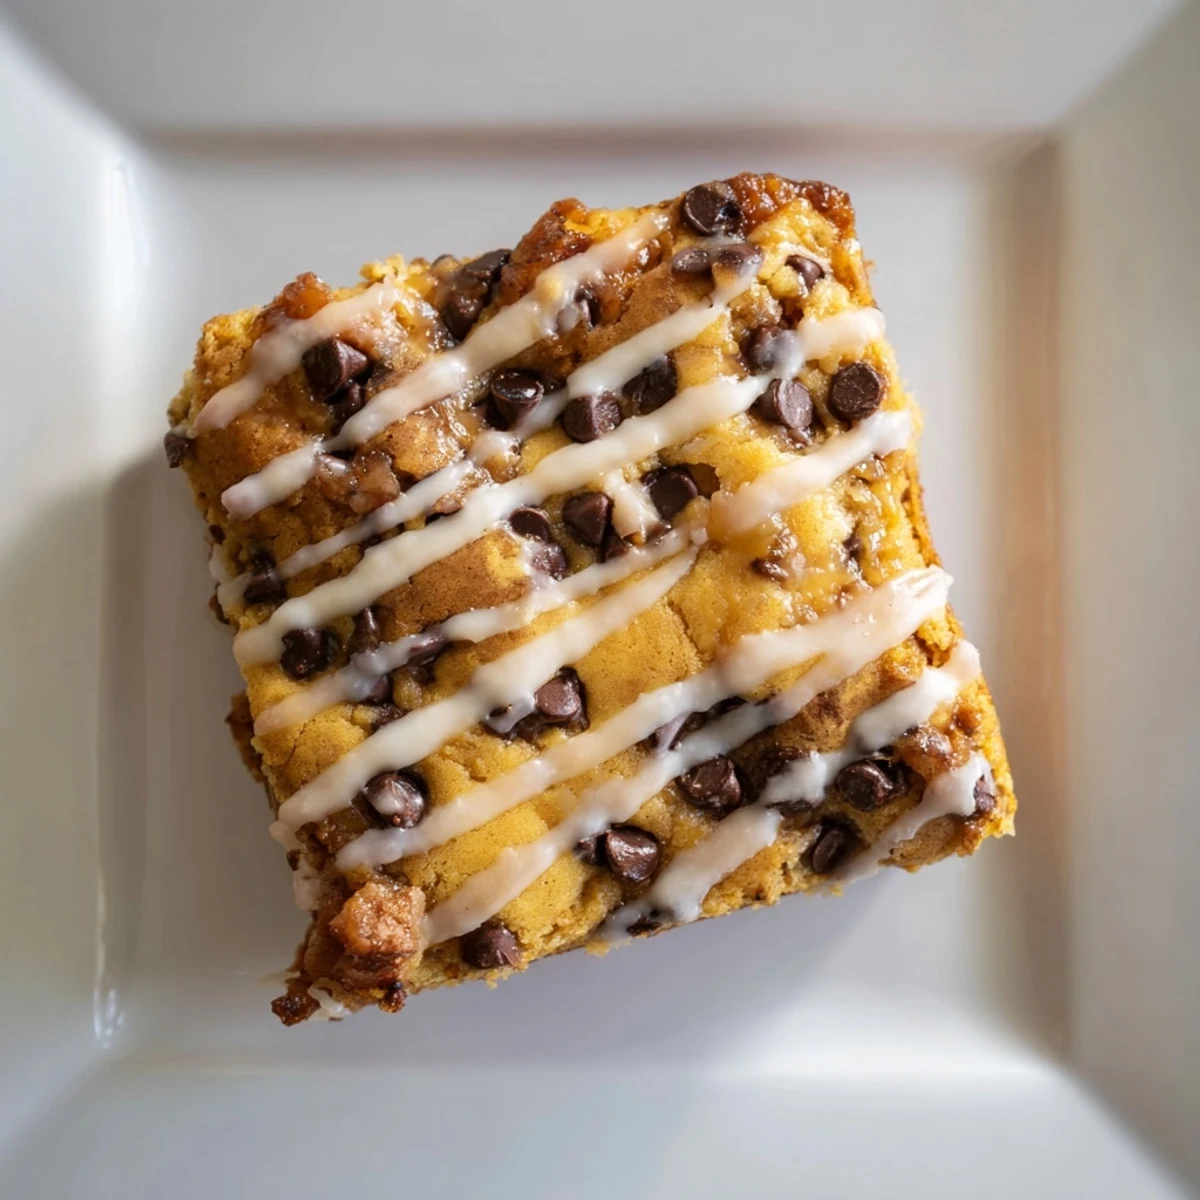
 These chewy chocolate chip bars feature a rich caramel swirl sandwiched between buttery dough layers, finished with a smooth vanilla glaze. Baked to a golden hue, they bring cozy warmth to winter gatherings. Easy to prepare in under an hour, they're perfect for sharing or savoring with hot cocoa. Optional toasted nuts and dark chocolate chips add extra texture and flavor depth.
The balance of brown and granulated sugars ensures a tender crumb, while vanilla enhances the sweet layers. Simply bake, cool, glaze, and slice into twelve generous squares. Enjoy a decadent treat that blends classic flavors with a frosty finish.
I discovered these January Bliss Caramel Frost Chocolate Chip bars on a cold afternoon when I was craving something that felt like pure comfort. There's something about the first month of the year that makes you want to bake something indulgent and warm, something that fills the kitchen with that buttery, chocolatey aroma that makes everyone pause and ask what you're making. I remember standing in my kitchen, mixing up the dough while snow fell outside, thinking about how a simple bar could somehow capture exactly what I needed: chewy chocolate, ribbons of caramel, and that dreamy vanilla glaze on top.
I brought a batch of these to my neighbor's coffee gathering, and watching everyone's faces light up when they bit into that caramel center reminded me why I love baking so much. One person literally closed their eyes and said, 'This is what January needed,' and I think that's exactly right.
Ingredients
- Unsalted butter, softened (1 cup): This is your foundation, and using softened butter means you'll get that light, fluffy base without overworking it. Let it sit on the counter for about 30 minutes if you're impatient like me.
- Light brown sugar (1 cup) and granulated sugar (1/2 cup): The combination of these two gives you both chewiness and structure. The brown sugar brings that caramel-like depth that makes these bars so special.
- Large eggs (2): They bind everything together and add richness. Room temperature eggs mix in more smoothly, though I've made these in a rush with cold ones too.
- Vanilla extract (2 tsp for dough, plus 1/2 tsp for glaze): Don't skip the good stuff here. It sounds like a small thing, but pure vanilla makes the whole experience taste more like a real bakery creation.
- All-purpose flour (2 1/2 cups): Just whisk it with the baking soda to distribute the leavening evenly. This prevents any dense patches in your bars.
- Baking soda (1 tsp): This gives you that tender crumb and helps the bars spread slightly for that chewy texture we're after.
- Salt (1/2 tsp): A small amount enhances everything and keeps the bars from tasting one-dimensional.
- Semisweet chocolate chips (1 1/2 cups): These are the stars. I've learned that folding them in gently keeps them from getting crushed, so you get those whole chip pockets.
- Caramel sauce (1/2 cup): Store-bought works beautifully here, and it's one of my favorite shortcuts. It saves time and honestly tastes just as good as homemade.
- Powdered sugar (1 cup) and milk (2-3 tbsp): The glaze is like the final hug. Mix it until it's pourable but thick enough to coat the bars with texture.
Instructions
- Set yourself up for success:
- Preheat your oven to 350°F and line your 9x13-inch pan with parchment paper. I always leave an overhang on the sides because it makes pulling the whole slab out of the pan so much easier when everything is cooled.
- Build your creamy foundation:
- Cream the softened butter with both sugars until it's light, fluffy, and takes on an almost pale color. This usually takes about three minutes with an electric mixer. You're aerating the mixture, which creates those tender pockets in your final bars.
- Introduce your eggs with care:
- Beat in one egg at a time, waiting for each one to fully incorporate before adding the next. Then add your vanilla. The mixture should look smooth and slightly glossy at this point.
- Combine your dry ingredients:
- In another bowl, whisk together the flour, baking soda, and salt. This takes thirty seconds but makes a real difference in how evenly the baking soda gets distributed, which means more uniform rising.
- Marry wet and dry gently:
- Add the dry mixture to the wet mixture just until combined. Overmixing here develops gluten, which would make your bars tough instead of chewy. You want to see just a few streaks of flour disappearing before you stop.
- Fold in the chocolate:
- Gently fold in your chocolate chips with a rubber spatula, trying to keep as many whole as possible. This is where you can add that optional handful of toasted nuts if you want extra texture.
- Create your first layer:
- Spread exactly half of the dough into your prepared pan. Use the back of an offset spatula or a measuring cup to press it evenly. This doesn't need to be perfect because you're covering it with caramel.
- Add the caramel magic:
- Drizzle the caramel sauce over the dough layer. If it's thick, warm it slightly to make it pourable. Don't worry about perfect coverage, you're going for that ribbon effect.
- Top with the remaining dough:
- Spread the second half of the dough gently over the caramel. Some will stick to your spatula, so work patiently. It doesn't need to cover every inch perfectly, little gaps just give you more caramel pockets.
- Bake until golden:
- Bake for 28 to 32 minutes until the top is golden brown. A toothpick inserted in the center should come out with moist crumbs, not wet batter. You want these chewy, not gooey in an undercooked way.
- Practice patience while cooling:
- Let them cool completely in the pan on a wire rack. This takes time, but rushing this step means your bars will crumble when you cut them. Use this time to make your glaze.
- Make the frosty finish:
- Whisk together powdered sugar, milk (start with 2 tablespoons), and vanilla extract. Add milk a teaspoon at a time until you have a pourable but slightly thick consistency. You want it to coat the bars and stay put, not run off.
- Glaze with intention:
- Drizzle the glaze over your cooled bars. Let it set for at least 15 minutes before cutting, which helps the glaze firm up and prevents dragging your knife through soft icing.
- Execute the perfect cut:
- Use the parchment overhang to lift the entire slab out of the pan. Cut into 12 equal squares. A sharp, thin knife dipped in hot water and wiped between cuts gives you the cleanest edges.
 Pin It
 There's a moment that happens when you hand someone one of these bars, and you see their eyes widen at that first bite when the caramel melts on their tongue. That's when you know you've created something more than just a dessert, something that brings a little warmth to a cold January day.
Why These Bars Became My Winter Favorite
There's something about the texture of these bars that keeps me coming back. The chewy cookie base contrasts perfectly with the caramel ribbons and that delicate vanilla glaze on top. I've made them dozens of times now, and I still feel that little thrill every time I pull them out of the oven. The combination of chocolate, caramel, and vanilla is honestly timeless, and the fact that they're so simple to execute means I actually make them regularly instead of saving them for special occasions.
The Art of the Perfect Caramel Swirl
Getting the caramel placement right took me a few batches to figure out. I learned that spreading the dough as evenly as possible in the first layer, then drizzling caramel in a systematic pattern across the whole surface, gives you caramel in every single bar. I used to just dump it in the middle and wonder why some pieces had none. Now I do thin drizzles back and forth like I'm writing, which sounds silly but honestly works perfectly.
Storage and Serving Secrets
These bars keep beautifully for up to five days in an airtight container at room temperature, which makes them perfect for batch baking. I've found they're best served at room temperature or slightly warmed, paired with coffee or hot cocoa on a cold afternoon. For a little something extra, serve them warm with a scoop of vanilla ice cream and watch it melt into those caramel pockets.
- Store in an airtight container with parchment between layers to prevent sticking.
- You can make these bars up to two days ahead, which makes them a lifesaver when you're planning ahead.
- They also freeze beautifully for up to a month, so make a double batch whenever you have the oven on.
 Pin It
 These January Bliss bars remind me that sometimes the simplest recipes bring the most joy. They're an easy win that feels indulgent, and honestly, that's exactly what a winter dessert should be.
Recipe Questions & Answers
- → Can I substitute dark chocolate chips?
-
Yes, dark chocolate chips can be used for a richer, slightly less sweet flavor that complements the caramel and vanilla glaze.
- → How do I prevent the bars from sticking to the pan?
-
Lining the baking pan with parchment paper creates an easy overhang to lift bars cleanly once cooled, preventing sticking.
- → What is the best way to store these bars?
-
Store bars in an airtight container at room temperature for up to three days or refrigerate to extend freshness for up to a week.
- → Can I add nuts to the bars?
-
Yes, adding chopped toasted pecans or walnuts to the dough adds crunch and enhances flavor.
- → Is the vanilla glaze necessary?
-
The glaze adds a smooth, sweet finish that balances the caramel’s richness, but bars can be enjoyed without it if preferred.
