 Pin It
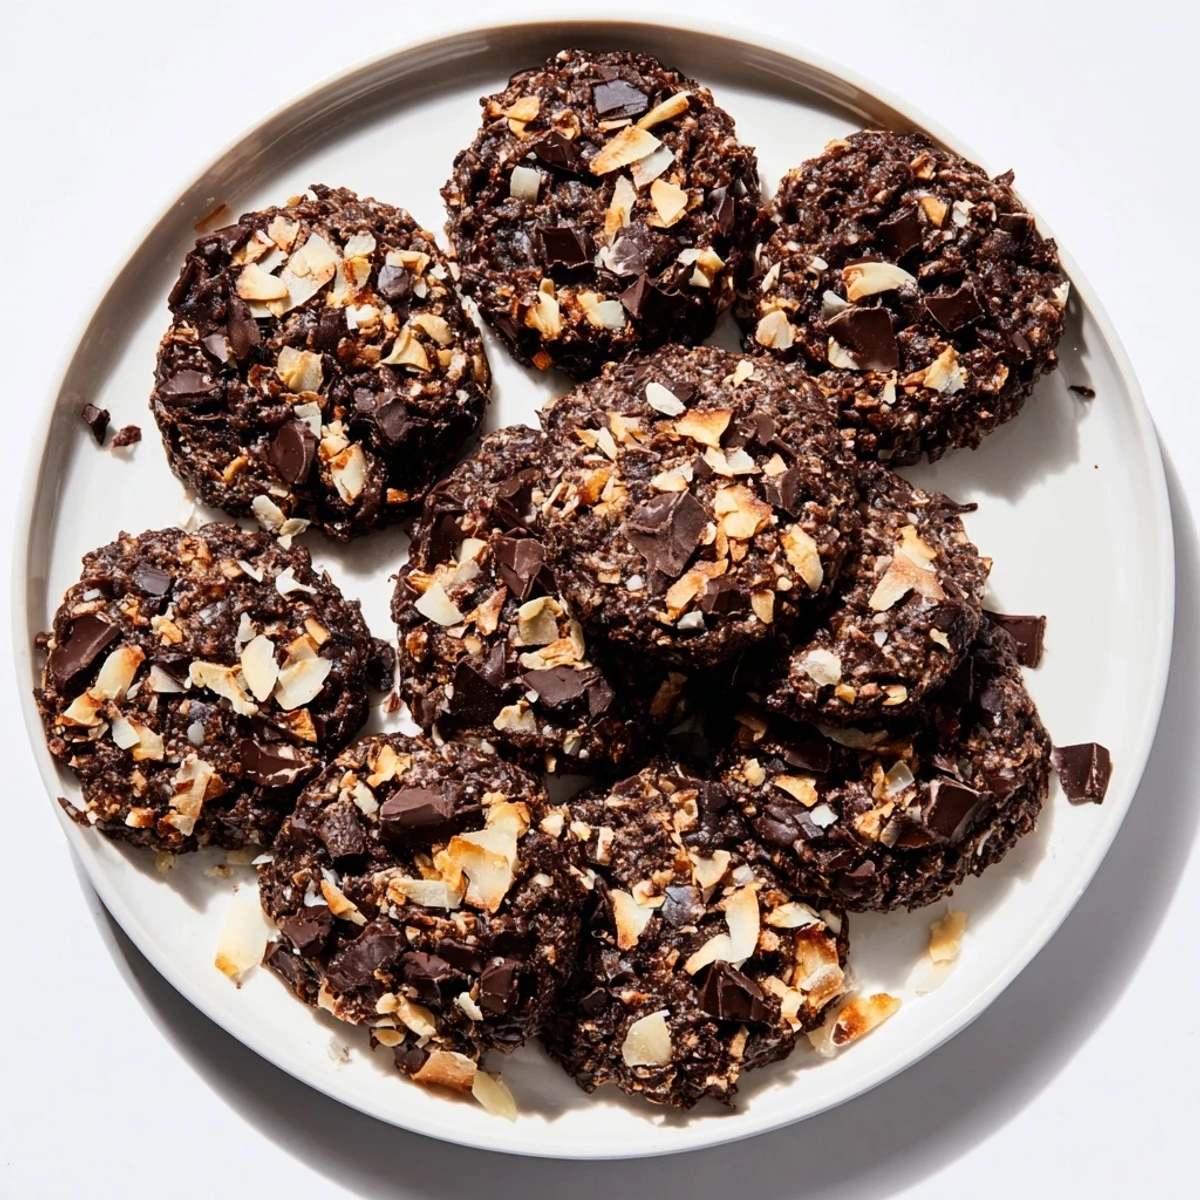
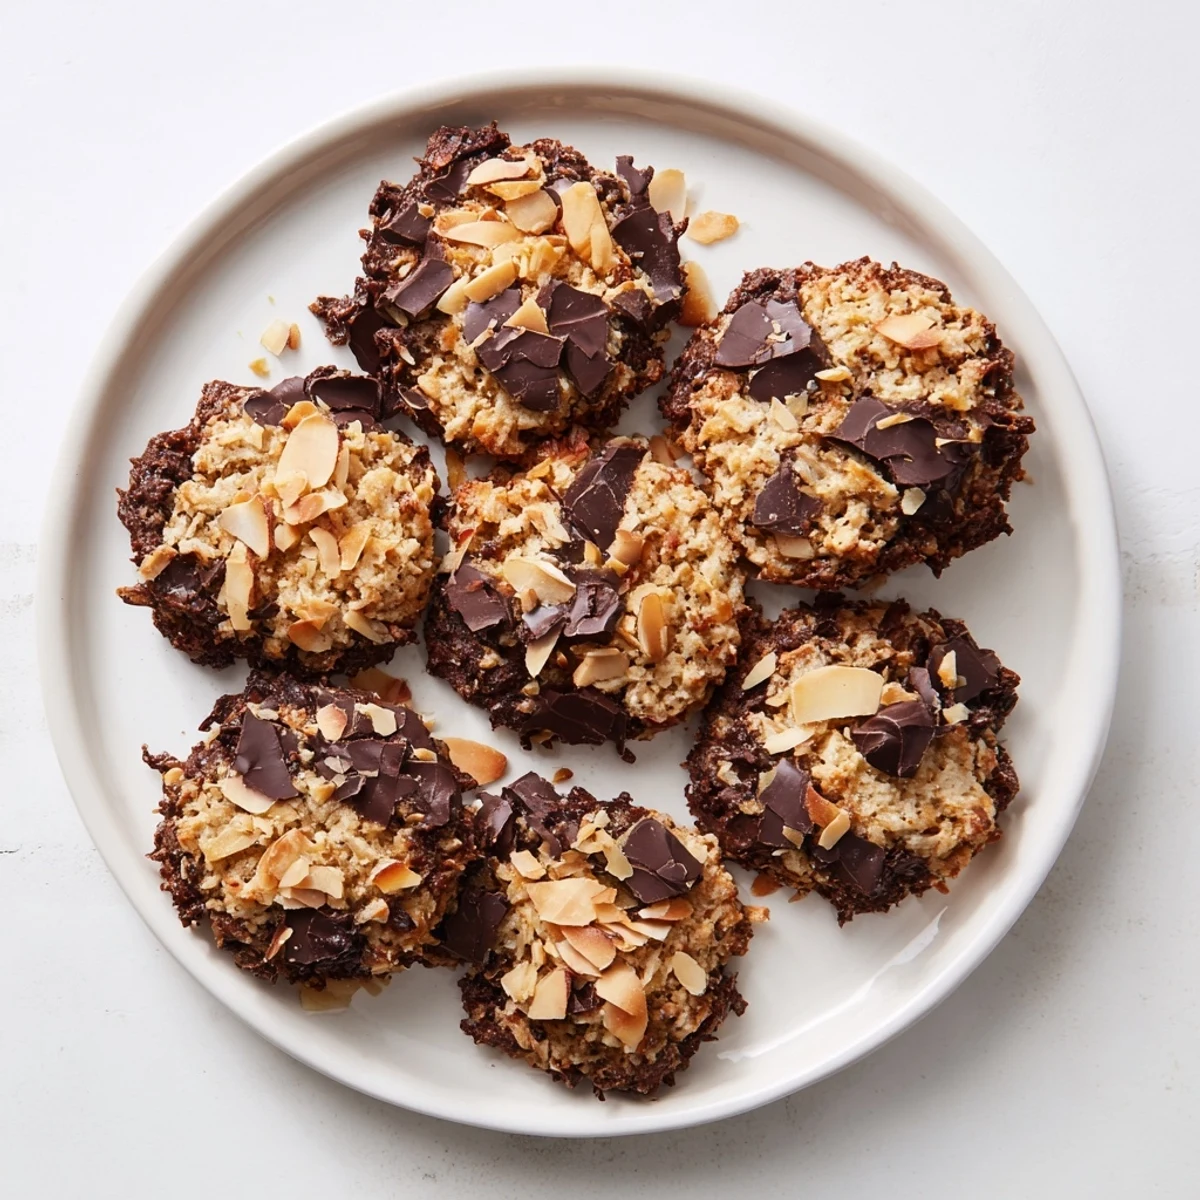
 These crispy treats combine toasted coconut flakes with rich dark chocolate chunks in a perfectly textured cookie that's completely gluten-free. The blend of coconut oil and butter creates irresistibly crunchy edges while keeping centers tender. Each bite delivers deep cocoa notes balanced by naturally sweet coconut, making them ideal for afternoon snacks or dessert platters.
The dough comes together quickly with just 15 minutes of prep time, and one batch yields 24 generous portions. Toasting the coconut beforehand intensifies the nutty flavor profile, while quality dark chocolate (60% cacao or higher) provides sophisticated richness. The optional roasted almonds add extra crunch for those who enjoy varied textures.
The first time I made these cookies was on a rainy Tuesday when my gluten-free friend Sarah was coming over. I'd been experimenting with coconut oil in baking and loved how it created this incredible shatteringly crisp texture. When she took that first bite and her eyes lit up, I knew we had something special. These have since become my go-to cookie for every gathering, regardless of who's eating what.
I remember bringing a batch to my sister's book club last month and watching three different people ask for the recipe, all while discussing how they normally avoid gluten-free treats. The kitchen smelled incredible while they were baking, like toasted coconut melting into dark chocolate. By the time I left, the platter was empty and my sister had already texted me twice asking when I could make more. Now they're requested for every family gathering.
Ingredients
- Gluten-free all-purpose flour blend: I've tested several brands and found that a blend with xanthan gum already included gives the best structure and texture for these cookies
- Baking soda and fine sea salt: These work together to balance sweetness and help the cookies achieve those perfectly golden edges with slightly chewy centers
- Unsalted butter and coconut oil: This combination is my secret weapon, butter for richness and flavor, coconut oil for that signature crisp texture that keeps beautifully
- Light brown and granulated sugars: Brown sugar adds moisture and depth while white sugar helps create those irresistible crisp edges we all love
- Eggs and pure vanilla extract: Use room temperature eggs for better incorporation, and don't skimp on the vanilla, it really shines with the coconut
- Unsweetened shredded coconut: Toasting it first intensifies the flavor dramatically and adds this wonderful nutty sweetness throughout every bite
- Dark chocolate chunks: I prefer chopping a good quality bar over using chips, the irregular pieces create those beautiful puddles of melted chocolate
- Chopped roasted almonds: Optional but highly recommended for extra crunch and protein, plus they complement the coconut flavors perfectly
Instructions
- Get everything ready:
- Preheat your oven to 350°F and line two baking sheets with parchment paper, trust me this saves so much cleanup time later
- Whisk your dry ingredients:
- In a medium bowl, combine the gluten-free flour blend, baking soda, and sea salt until everything is evenly distributed
- Cream the butter and coconut oil:
- Beat together your softened butter and solid coconut oil with both sugars until the mixture turns pale and fluffy, about 2 full minutes
- Add the eggs and vanilla:
- Crack in your eggs one at a time, beating well after each addition, then pour in the vanilla and let everything get fully incorporated
- Combine everything:
- Gradually mix in your dry ingredients just until you no longer see streaks of flour, being careful not to overmix the dough
- Fold in the good stuff:
- Gently fold in your toasted coconut, dark chocolate chunks, and almonds if you're using them, until they're evenly distributed throughout the dough
- Scoop and space:
- Drop tablespoon-sized mounds onto your prepared baking sheets, giving each cookie about 2 inches of room to spread and bake into perfection
- Bake to golden:
- Bake for 10 to 12 minutes until the edges are beautifully golden and the centers look just slightly underdone, they'll finish cooking on the pan
- Cool completely:
- Let them rest on the baking sheet for 5 minutes to set, then move them to a wire rack to cool completely if you can resist eating them warm
 Pin It
 Last Christmas I made six dozen of these cookies for our neighborhood cookie exchange, and they were the first ones gone. My neighbor's daughter who has celiac disease actually teared up because she could eat everything at the party. That moment of pure inclusion and joy made these cookies feel like so much more than just a recipe. Now they're our holiday tradition.
Getting The Perfect Toast
I learned this technique after burning countless batches of coconut in the oven. Now I toast my shredded coconut in a dry skillet over medium heat, shaking the pan constantly and watching carefully. It only takes about 3 to 4 minutes to transform from pale white to golden brown and incredibly fragrant. The difference in flavor is absolutely worth the extra attention.
Making Them Your Own
Sometimes I swap half the coconut for chopped pecans when I want something different, or add dried cherries for a chocolate covered cherry vibe. During winter, a pinch of cinnamon mixed into the dry ingredients creates the coziest variation. The base recipe is so forgiving that it welcomes creativity beautifully.
Storage And Freezing
These cookies stay remarkably crisp for up to a week in an airtight container at room temperature, which is pretty miraculous for gluten-free baking. I often freeze balls of dough on a baking sheet, then transfer them to a freezer bag for freshly baked cookies whenever the craving strikes.
- Bake frozen dough balls for just 2 extra minutes and nobody will know the difference
- Layer baked cookies between parchment paper in the freezer to prevent sticking
- Thaw frozen baked cookies on a wire rack to maintain their signature crisp texture
 Pin It
 There's something so satisfying about pulling these golden beauties from the oven and watching everyone gravitate toward the kitchen. Hope they become as beloved in your home as they are in mine.
Recipe Questions & Answers
- → Can I make these completely dairy-free?
-
Yes, substitute the unsalted butter with additional coconut oil or a dairy-free butter alternative. The texture remains excellent, and coconut flavor becomes more pronounced.
- → Why should I toast the coconut before adding?
-
Toasting coconut enhances its natural nutty flavor and creates deeper crunch throughout the finished treat. Spread shredded coconut on a baking sheet at 350°F for 5-7 minutes, watching closely to prevent burning.
- → How should I store these for best texture?
-
Keep in an airtight container at room temperature for up to 5 days. The toasted coconut maintains crunch best when stored in cool, dry conditions. Avoid refrigeration as this can make them lose their crisp texture.
- → Can I freeze the dough for later?
-
Scoop dough into balls, place on a baking sheet, and freeze until solid. Transfer to freezer bags and store for up to 3 months. Bake from frozen, adding 1-2 minutes to the baking time.
- → What's the best dark chocolate percentage?
-
Chocolate with 60-70% cacao provides ideal balance—sweet enough to complement coconut while delivering sophisticated cocoa depth. Higher percentages work for those preferring less sweetness.
