 Pin It
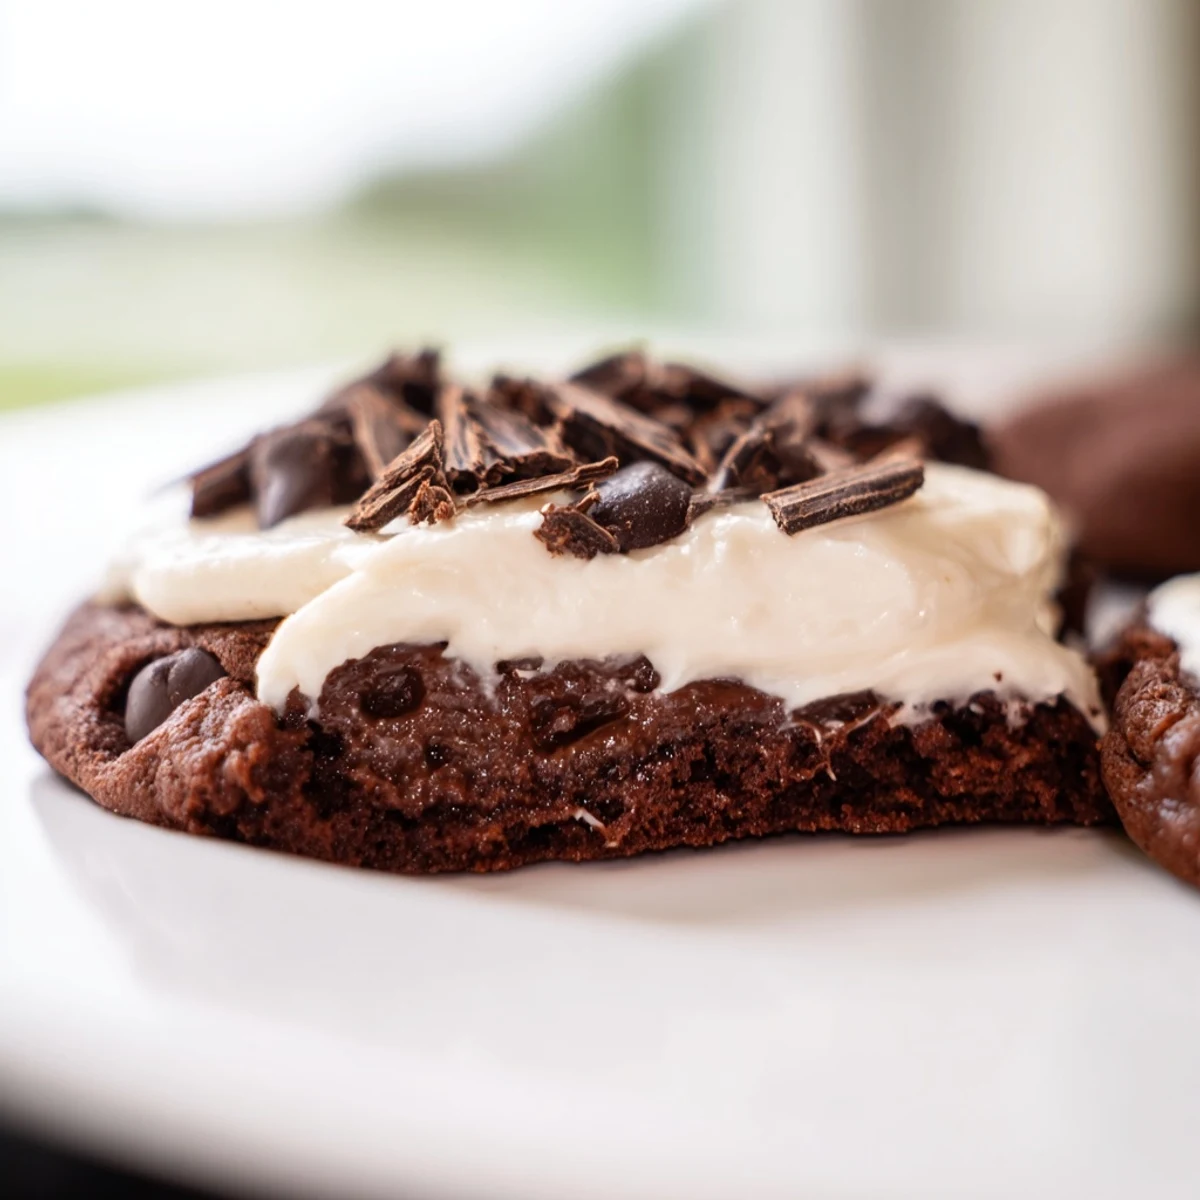
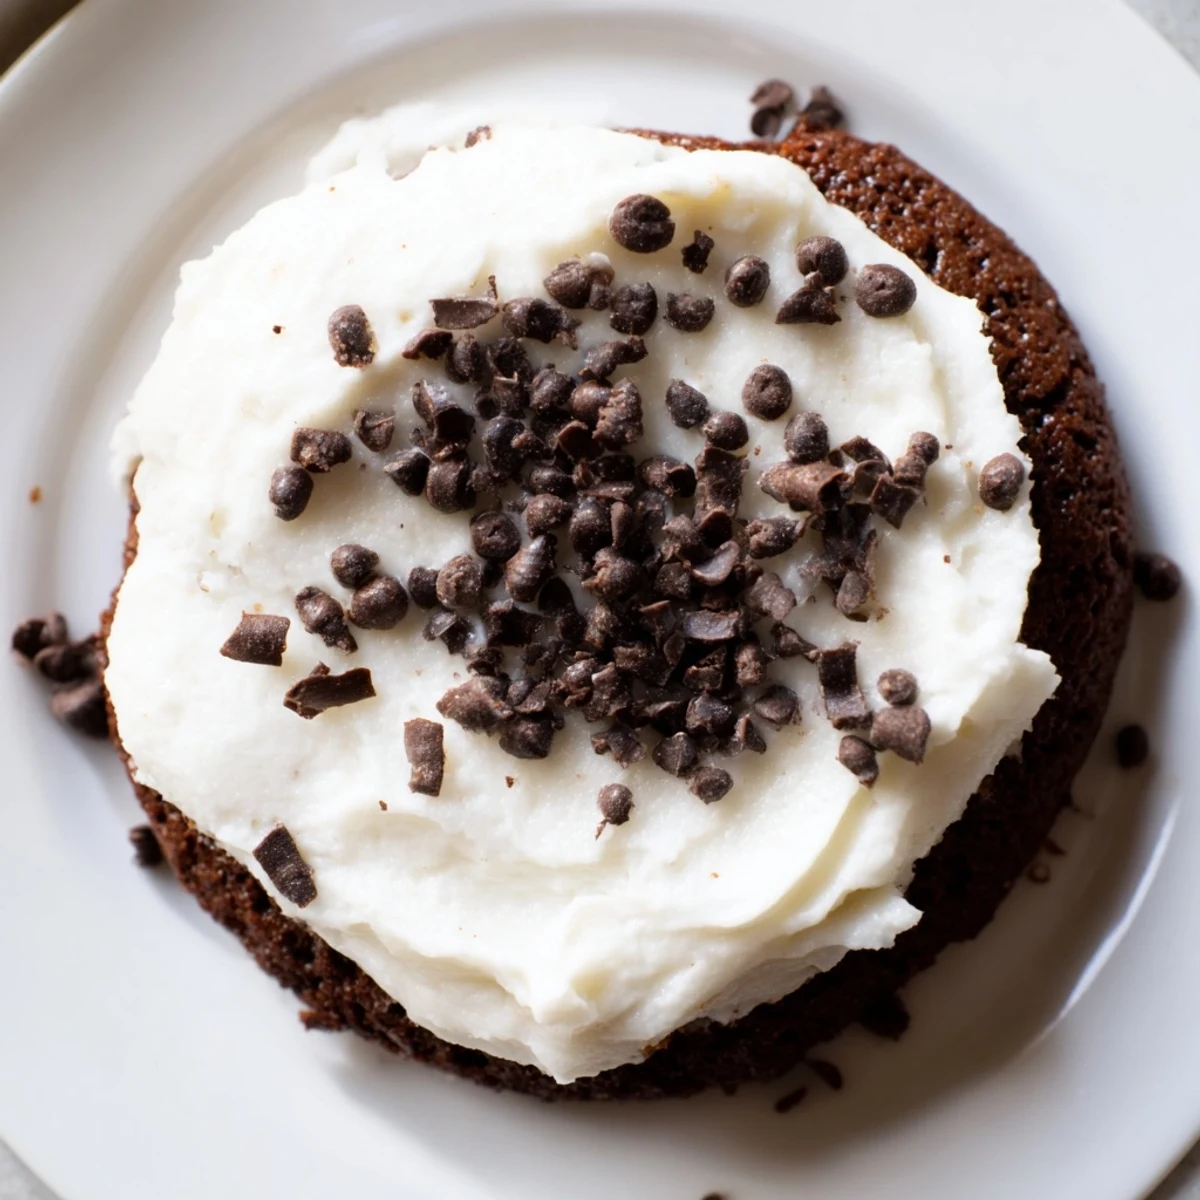
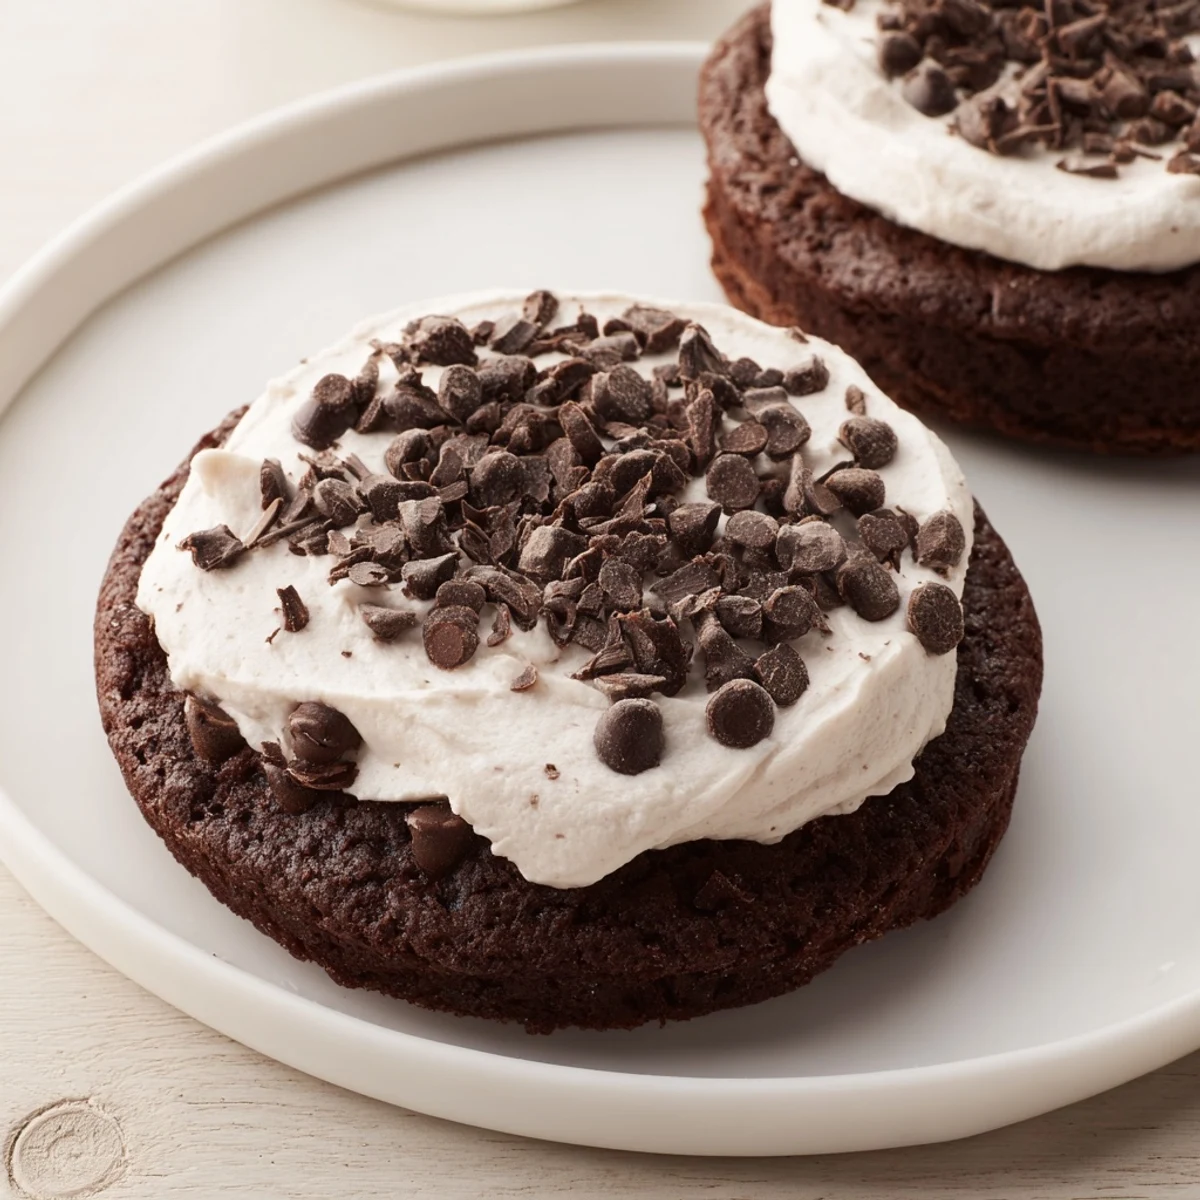
 This indulgent treat features large, cocoa-infused chocolate chip cookies baked to a soft finish. After cooling, each is generously topped with a smooth vanilla frosting that blends buttery richness with sweet notes. The recipe balances flavors with a touch of salt and optional espresso powder for added depth. Simple preparation and baking steps yield a festive, bakery-style delight perfect for sharing or savoring solo.
There's something about the smell of cocoa and butter creaming together that stops me mid-thought every time. Years ago, I grabbed a friend's recipe at a holiday party, scribbled on the back of a napkin, and decided I'd make these for my sister's birthday. The first batch came out dark, fudgy, and somehow even better than I expected, and then came the frosting—that moment when you spread that vanilla cloud across a warm cookie and realize you've just made something worth repeating forever.
I brought these to a book club once, and someone literally closed their eyes after one bite and said nothing for a full minute. That silence told me everything—they'd just experienced that exact moment where the soft center meets the crispy edge and the frosting dissolves into something almost indulgent. That's when I knew this recipe had staying power.
Ingredients
- Unsalted butter (1 cup softened): This is your foundation—use real butter, softened to that perfect stage where it leaves a gentle fingerprint but doesn't feel greasy.
- Granulated and brown sugar (1 cup each): The combo gives you structure and deep flavor; brown sugar brings moisture, granulated sugar brings spread and lift.
- Eggs (2 large): Add them one at a time so they actually incorporate and don't just sit there; this makes your cookies tender.
- Vanilla extract (2 tsp for dough, 1 tsp for frosting): Don't skip this or cheap out here—good vanilla makes all the difference between a cookie and a memorable one.
- All-purpose flour (2½ cups): Measure by spooning and leveling, not scooping straight from the bag, or you'll end up with dense cookies.
- Unsweetened cocoa powder (¾ cup): This is what makes them special; the cocoa powder gives you that deep chocolate flavor without competing with your chocolate chips.
- Baking soda and salt: Baking soda here is essential for spread and rise; salt enhances everything and balances sweetness.
- Semi-sweet chocolate chips (2 cups): Use chips you'd actually eat by themselves—they're the star supporting player.
- Powdered sugar (2 cups sifted): Sifting removes lumps and makes your frosting silky instead of gritty.
- Whole milk (2 tbsp): This keeps the frosting spreadable without making it thin; start with 1 tbsp if you like it thicker.
Instructions
- Get Your Oven Ready:
- Preheat to 350°F and line your baking sheets with parchment paper so nothing sticks and cleanup is basically nonexistent.
- Cream Butter and Sugars:
- Beat the softened butter with both sugars for about 2 minutes until it's pale and fluffy—this takes longer than you think it should, but it's worth it because air beaten into the mixture makes your cookies tender. You want it to look almost mousse-like.
- Add Eggs and Vanilla:
- Add eggs one at a time, beating well after each one so they actually mix in instead of creating little pockets of raw egg. Then add vanilla and mix just until it's blended in.
- Combine Dry Ingredients:
- In a separate bowl, whisk together flour, cocoa powder, baking soda, and salt—whisking matters because it distributes the baking soda evenly so you don't bite into a bitter pocket. This prevents dense spots too.
- Bring It Together:
- Gradually add the dry mix to the wet ingredients and mix just until no streaks of flour remain; overmixing at this stage makes tough cookies and nobody wants that.
- Fold in Chocolate Chips:
- Gently fold the chips in with a spatula or wooden spoon, making sure they're distributed throughout—this is the moment where you get to taste a tiny bit of raw dough and remember why you love baking.
- Scoop and Space:
- Use a rounded tablespoon or small ice cream scoop and leave at least an inch between each cookie because they do spread and you want them to bake evenly.
- Bake with Intention:
- Bake 11-13 minutes until the edges look set but the centers still jiggle slightly when you nudge the pan—this is the secret to soft centers. They continue cooking on the hot pan after you pull them out.
- Cool Strategically:
- Leave them on the baking sheet for 5 minutes so they firm up enough to move without breaking, then transfer to a wire rack to cool completely. This takes about 30 minutes but you can speed it up with the freezer if you're impatient.
- Make the Frosting:
- Beat softened butter until creamy, gradually add sifted powdered sugar, then milk and vanilla, beating until smooth and cloud-like. Taste it as you go—you might want a splash more vanilla or milk depending on your preference.
- Frost and Decorate:
- Once cookies are fully cool, spread frosting generously with an offset spatula or pipe it on if you're feeling fancy. Top with sprinkles or chocolate shavings while the frosting is still soft so they stick.
- Let It Set:
- Give the frosting 15-20 minutes to firm up before serving so it doesn't smudge all over your hands.
 Pin It
 My nephew once picked one of these over birthday cake at a party, and his mom gave me a look like I'd just performed magic. That's when I realized these cookies aren't just a treat—they're the kind of thing that makes people feel seen and celebrated in the simplest way possible.
Why Cocoa Powder Makes All the Difference
Cocoa powder sounds simple, but it's actually the backbone of what makes these cookies feel sophisticated. It deepens the chocolate flavor without adding fat or moisture like melted chocolate would, which means you get rich taste and still maintain that perfect tender texture. I learned this the hard way when I once tried substituting extra chocolate chips for the cocoa powder—they spread everywhere and tasted one-dimensional, like I'd forgotten how to bake.
The Frosting-to-Cookie Balance
The vanilla frosting isn't just decoration—it's an essential contrast that makes people pause mid-bite. Without it, you have a really good chocolate cookie. With it, you have something that tastes like an indulgent celebration. The sweetness of the frosting actually highlights the slight bitterness of the cocoa, creating this balanced flavor that keeps you reaching for another cookie instead of feeling overwhelmed by chocolate.
Storage and Make-Ahead Magic
These cookies age beautifully, which means you can actually plan ahead for once in your life. The dough freezes for up to three months, so you can scoop it onto a baking sheet, freeze it, then bake straight from frozen (add a minute or two to the baking time). Frosted cookies last three days at room temperature in an airtight container, though they rarely make it that long in my house.
- If you're making these ahead, frost them the day you plan to serve them so the frosting stays pretty and the cookies stay soft.
- The unfrosted cookies can be frozen baked and undecorated for up to two weeks—just thaw at room temperature before frosting.
- Transport these in a single layer with parchment between cookies so they don't smudge into each other.
 Pin It
 These cookies have a way of turning an ordinary afternoon into something worth remembering. Whether you're baking them for someone special or just for yourself, they're the kind of recipe that reminds you why you love spending time in the kitchen.
Recipe Questions & Answers
- → What is the best way to achieve a soft cookie texture?
-
Ensure not to overbake; remove cookies when edges are set but centers remain soft. Allow to cool fully to set texture.
- → Can I substitute unsweetened cocoa powder with another type?
-
Natural unsweetened cocoa powder is preferred for its deep flavor, but Dutch-processed cocoa can be used for a milder taste.
- → How should I store the finished cookies to keep them fresh?
-
Store in an airtight container at room temperature for up to three days to maintain freshness and frosting quality.
- → Is it possible to tint the vanilla frosting?
-
Yes, adding food coloring to the frosting creates festive colors without altering the smooth texture.
- → What tools are recommended for preparing the batter and frosting?
-
Use mixing bowls and an electric or stand mixer for creaming butter and sugar, and a spatula or piping bag for frosting application.
